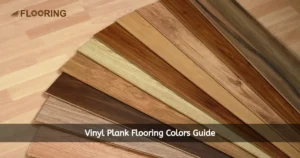
In 2026, numerous floor transition ideas can help you achieve the perfect balance between function and style. Whether you’re looking to transition from tile to wood, wood to tile, or any other combination, you’ll get amazing ideas to inspire your next flooring project.
We’ll cover 50 amazing ideas for floor transition and tips that ensure a perfect transition every time. Whether you’re dealing with clean hardwood floors or blending different materials, our guide will provide you with actionable insights to achieve flawless results.
📑 Table of Content
Key Takeaways
- Trends In Floor Transition Design: Trendy floor transitions are crucial for both functionality and aesthetics in home design.
- Minimalist Transitions: These create a clean and understated look using simple, elegant strips.
- Bold And Decorative Transitions: These make a statement with contrasting colors, patterns, and materials.
- Eco-Friendly Transition Options: Sustainable materials like bamboo and cork are popular for their environmental benefits.
- Common Floor Transition Challenges: Uneven floors and different heights require specific solutions for a seamless finish.
- Dealing With Uneven Floors: Use transition strips, self-leveling compounds, or gradual slopes to address uneven floors.
- Bridging Different Floor Heights: Utilize transition strips, ramps, or custom solutions for different heights.
- Common Floor Transition Mistakes To Avoid: Plan transitions during the design phase and choose the right materials to prevent issues.
- Floor Transition Maintenance Tips: Regular cleaning, prompt repairs, and using appropriate cleaners are essential for longevity.
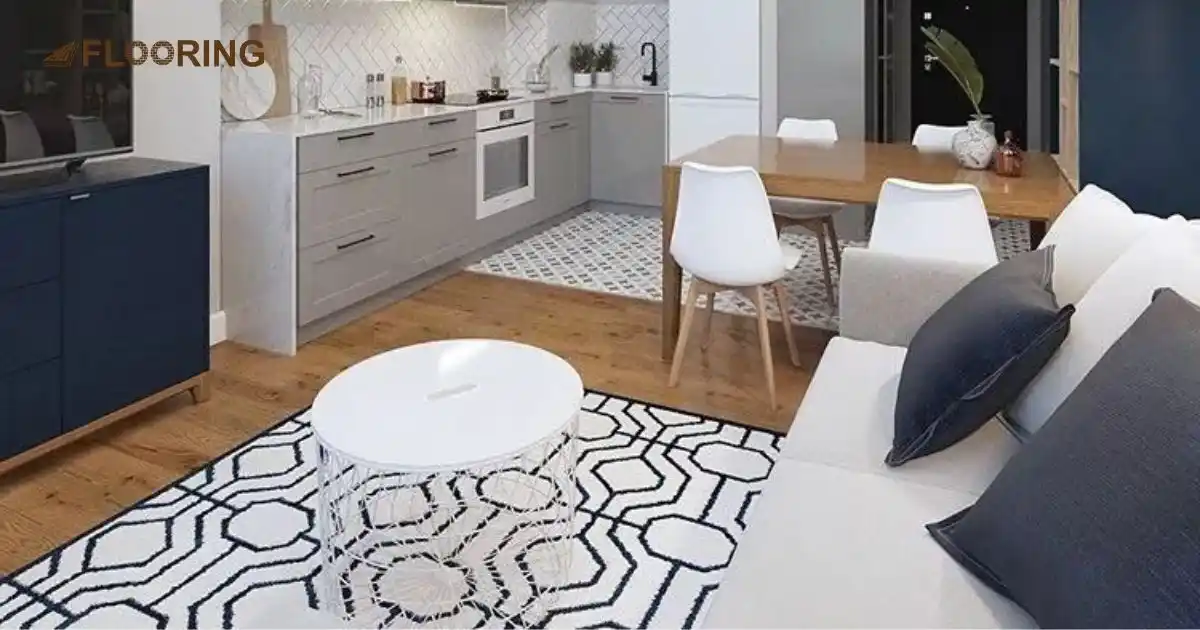
Different Types of Flooring Transition

Flooring transitions ensure a smooth flow between spaces while enhancing the overall look. In the following sections, we will explore specific transition ideas, including tile-to-wood floor transition, tile-to-laminate transition, and tile-to-tile transition.
Tile to Wood Floor Transition
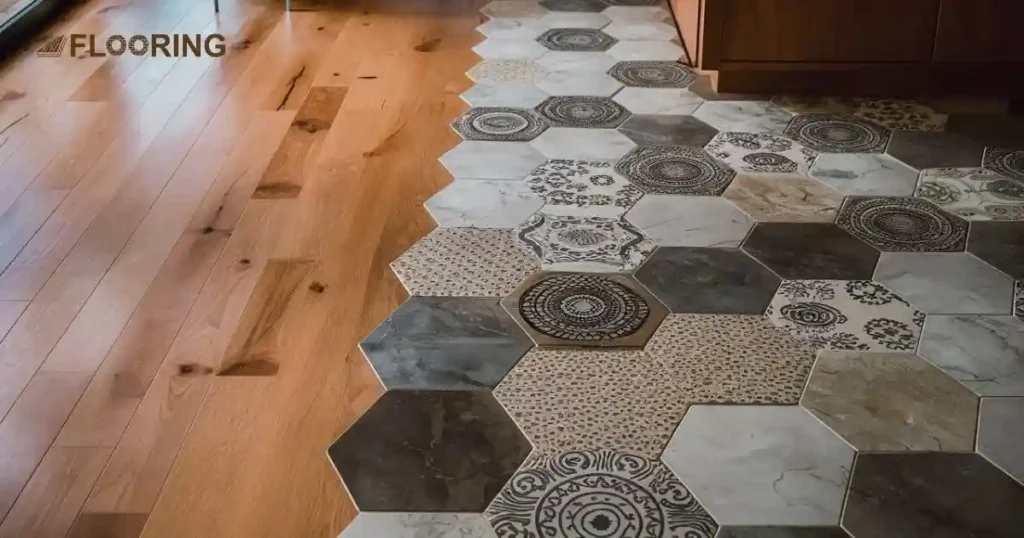
The tile to wood floor transition combines the durability of tile with the warmth of wood. You can use transition strips to create a smooth connection between the two surfaces. This method is ideal for areas like kitchens and living rooms, where both materials can complement each other beautifully.
Tile to Laminate Transition
Transitioning from tile to laminate is a great way to combine the elegance of tile with the affordability and versatility of laminate. This type of transition works well in spaces like hallways or dining areas. You can use transition strips to ensure a smooth changeover between the two materials. For a more cohesive look, consider matching the color and style of the transition strip to the laminate flooring.
Tile to Tile Transition
These transitions are often used in areas like bathrooms and kitchens where multiple types of tile might be needed. Title-to-tile transitions can be done using grout lines, creating a seamless and uniform look.
Another option is to use a decorative border or a different tile pattern to mark the transition. This approach not only adds visual interest but also helps in defining different functional areas within the same space.
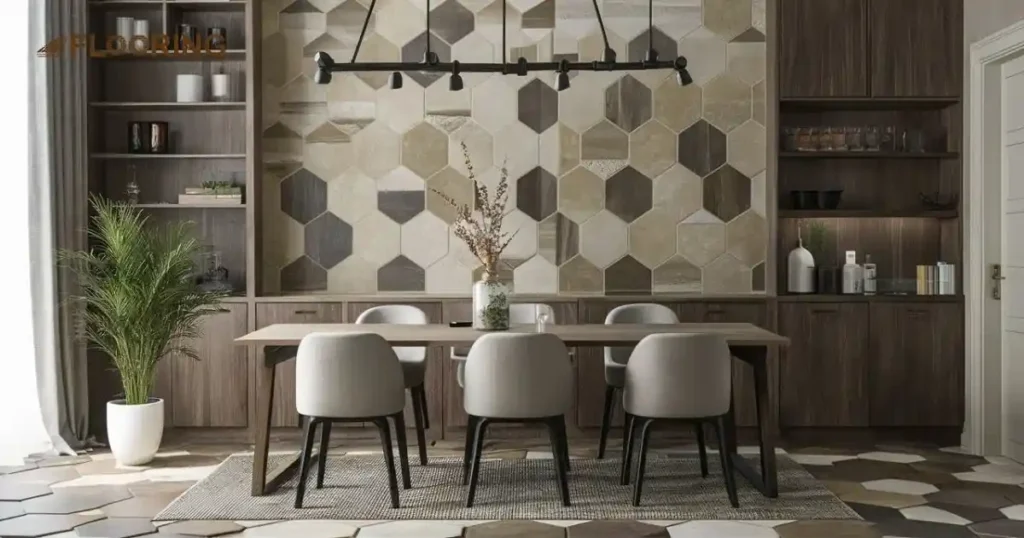
50 Floor Transition Ideas
Let’s explore 50 inspiring floor transition ideas that will transform your living spaces. From subtle shifts to bold statements, these ideas will help you create stunning, functional areas in your home.
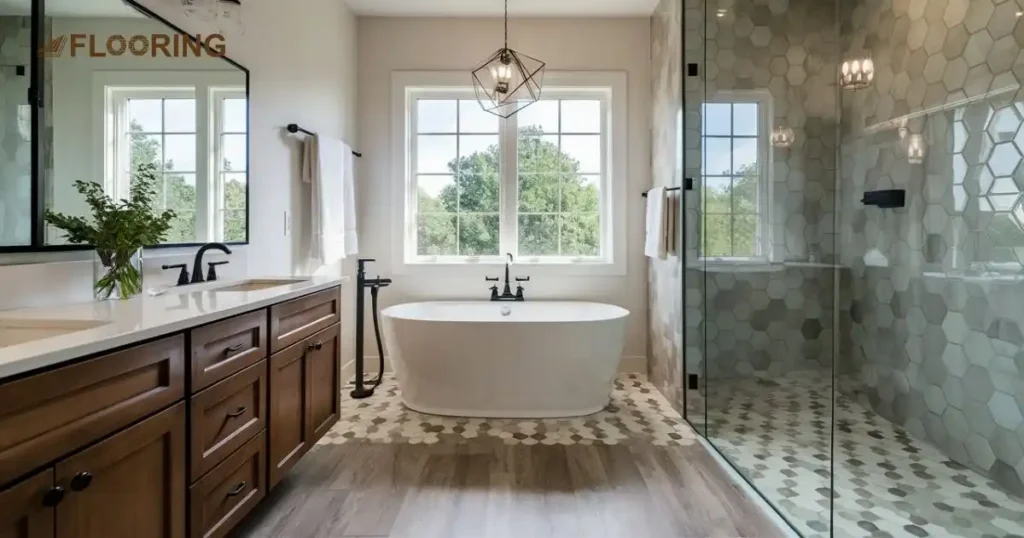
1. Black Hex Tiles to Laminate
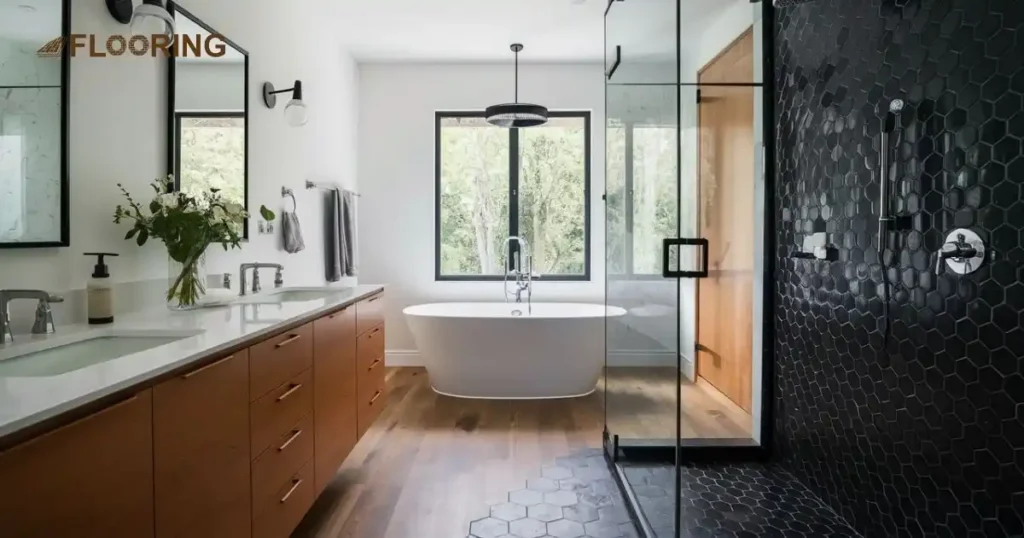
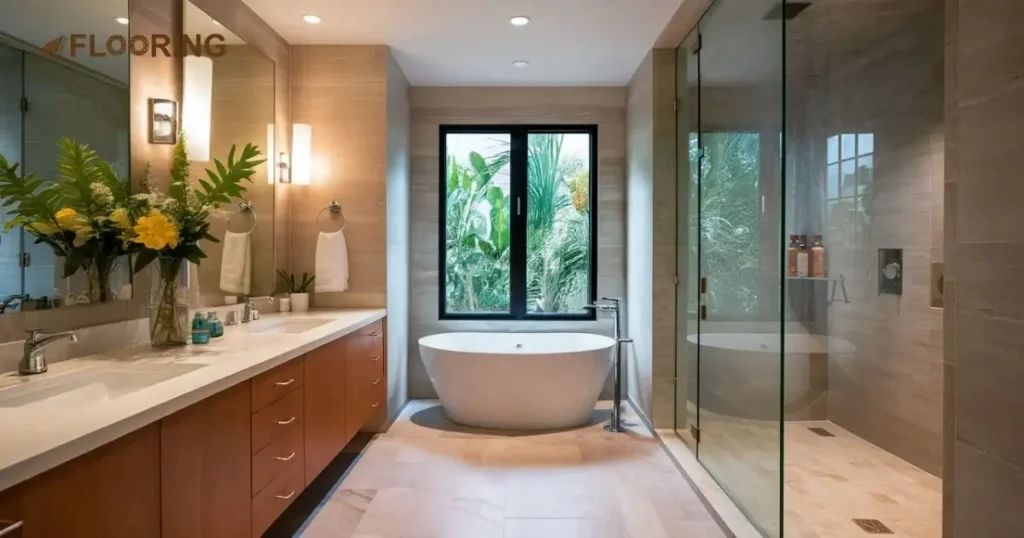
Create a striking modern bathroom with a bold tile to wood floor transition. Use black hexagonal tiles near the shower and bathtub, then switch to warm laminate for the rest of the space. This contrast adds depth and interest to your bathroom design.
2. Reclaimed Wood and Hex Tiles
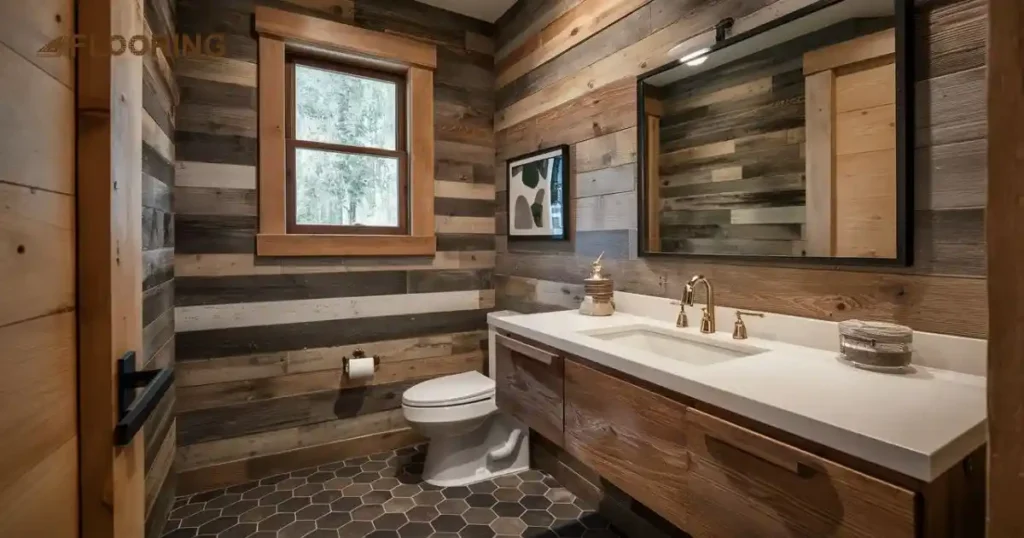
Blend rustic charm with modern flair in your powder room. Pair reclaimed wood walls with hexagonal tile flooring. Add a wall-mounted vanity for a sleek touch. This combination creates a unique, eye-catching design that guests will love.
3. Chevron Wood and Geometric Tile Transition
Sometimes, less is more, a clean transition from hexagonal tiles to wood flooring can be stunning. This simple yet effective approach works well in various spaces, from kitchens to living rooms. The contrast in materials adds visual interest without overwhelming the room.
4. Fish Scale Concrete and Wood
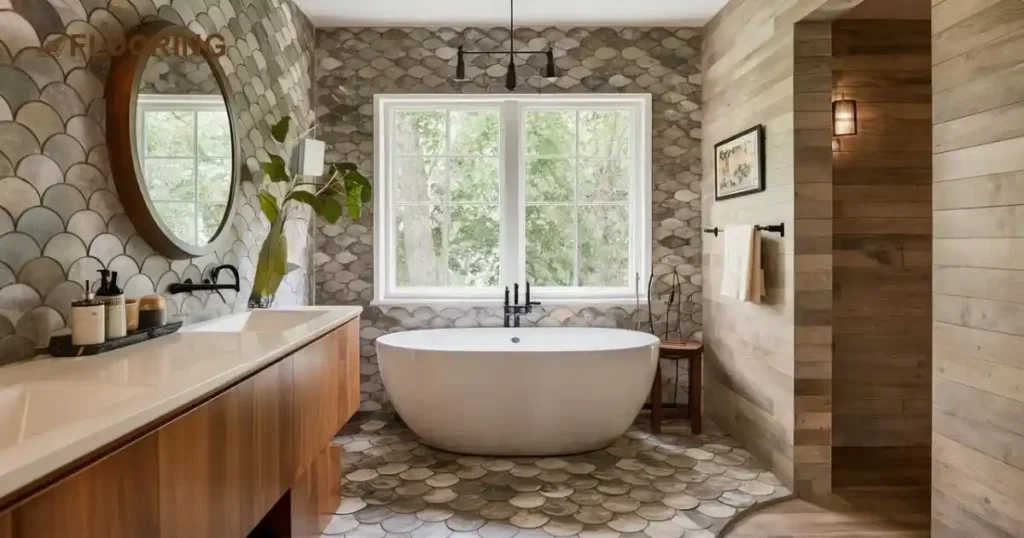
For a playful design, try fish scale scallops in concrete transitioning into wood flooring. This unique combination adds movement and texture to your space. It’s perfect for bathrooms or entryways where you want to make a statement.
5. Gray Hex Tiles and Faux Wood
Combine the sleek look of gray hexagonal tiles with the warmth of faux wood flooring. This pairing offers durability and style. The neutral color palette allows for versatile decor choices. It’s great for high-traffic areas that need both function and beauty.
6. Creative Color Mix – Same-Shape Tiles
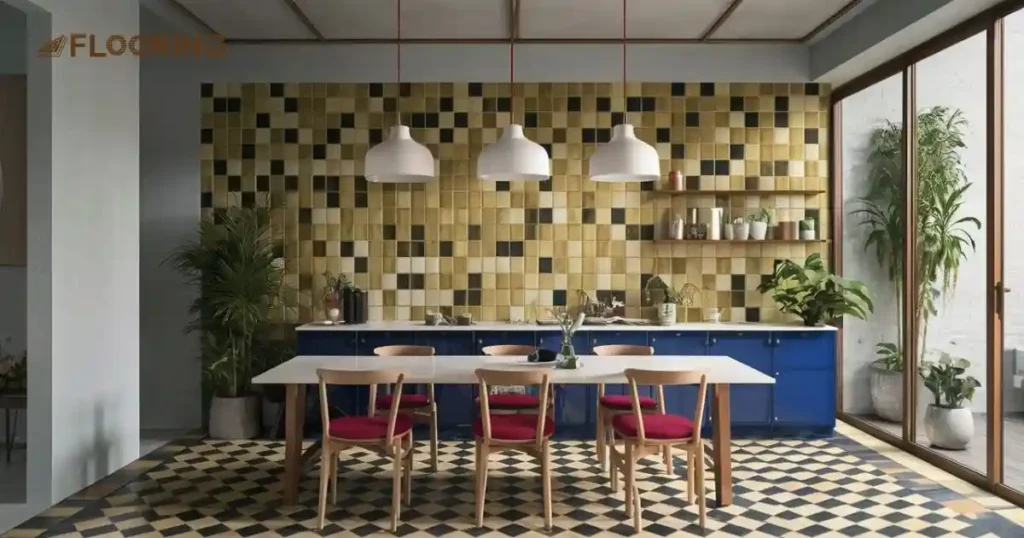
Get creative with tiles of the same shape but different colors. This technique creates a stylish, irregular transition within one space. It’s a great way to define areas in open floor plans. The gradual color shift adds visual interest and depth to your room.
7. Bathroom Curb Transition
A slight curb can provide a practical and attractive transition out of the bathroom. This design element helps contain water and defines the space. It’s a subtle yet effective way to separate wet and dry areas while maintaining a cohesive look.
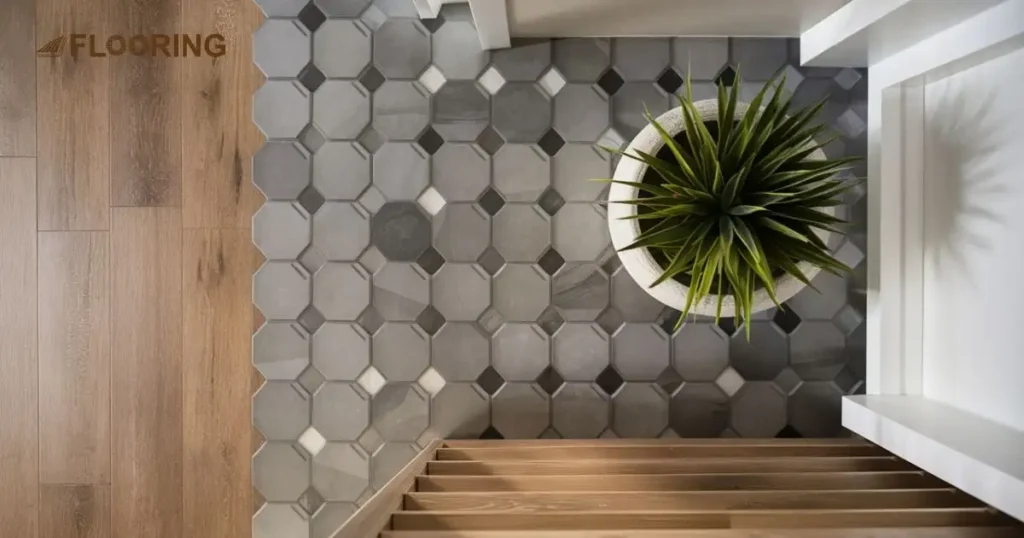
8. Non-Hexagonal Floor Transition
Think beyond hexagons for your floor transition. Experiment with other shapes like diamonds, triangles, or even organic forms. This approach allows for more creativity and personalization and this unique transition becomes a focal point in your space.
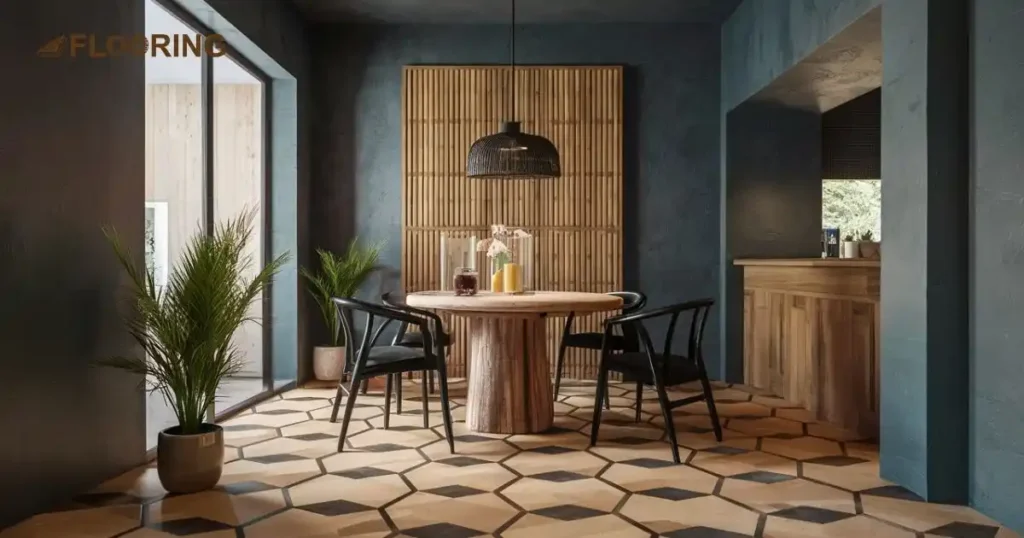
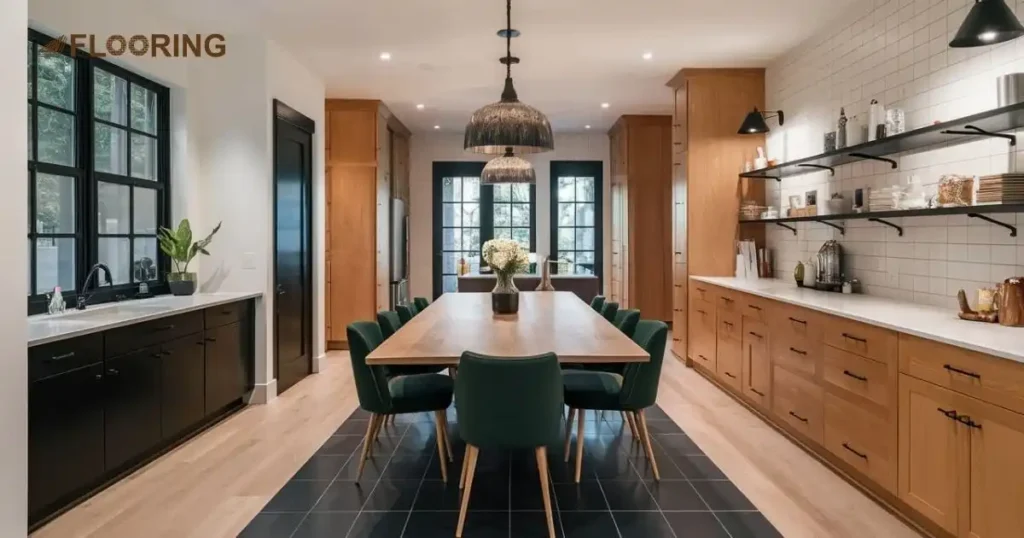
9. Hex Tiles Surrounded by Wood
Define your dining area with hexagonal tiles surrounded by wood flooring. This technique creates a visual rug effect without the maintenance of an actual rug. It’s a practical and stylish way to zone your open-plan living space.
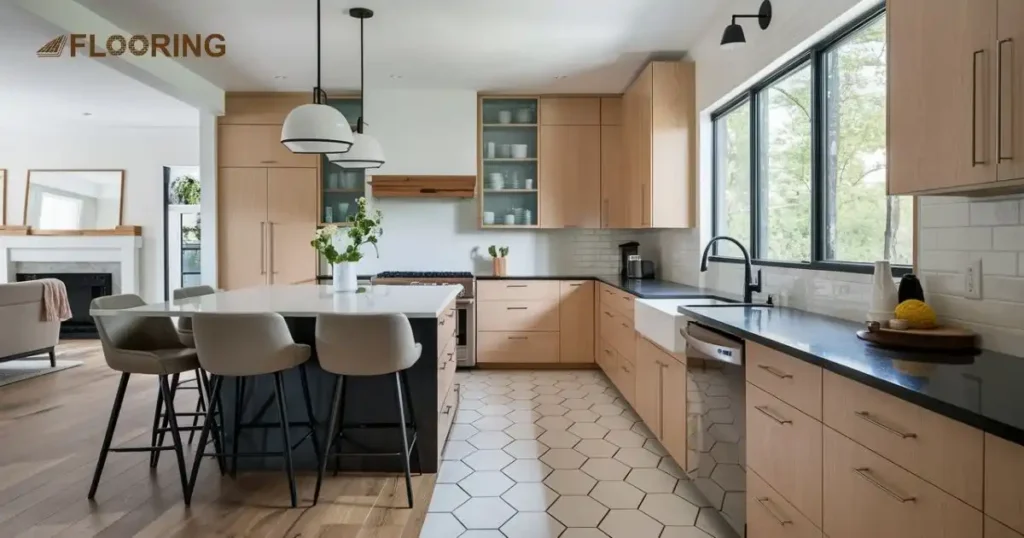
10. Large Scale Hex Tiles to Laminate
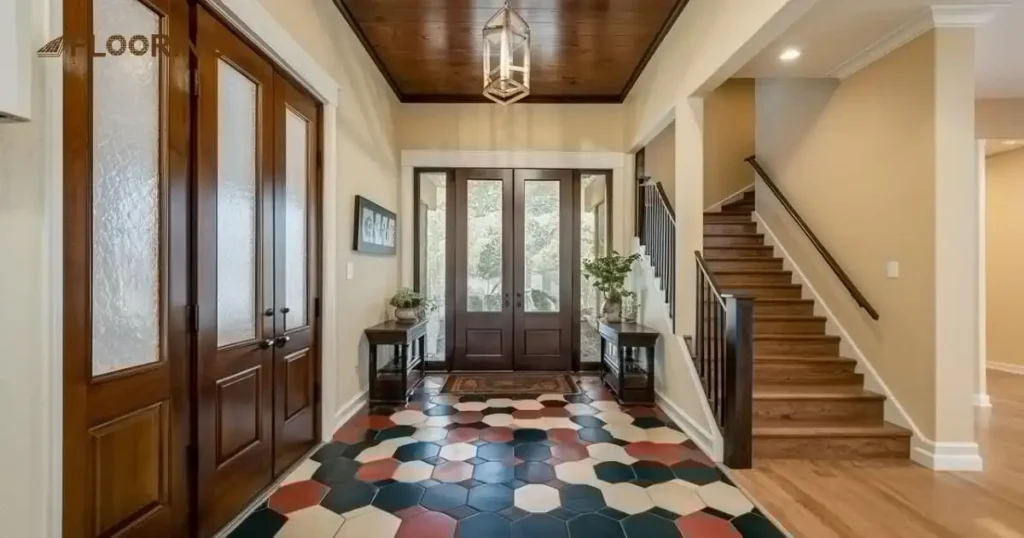
Make a statement in your entryway with large-scale hexagonal tiles in various colors. Transition these into warm-colored laminate for the rest of the space. This bold entrance sets the tone for your home while providing a practical, easy-to-clean surface.
11. Laminate to Blue Hex Tiles
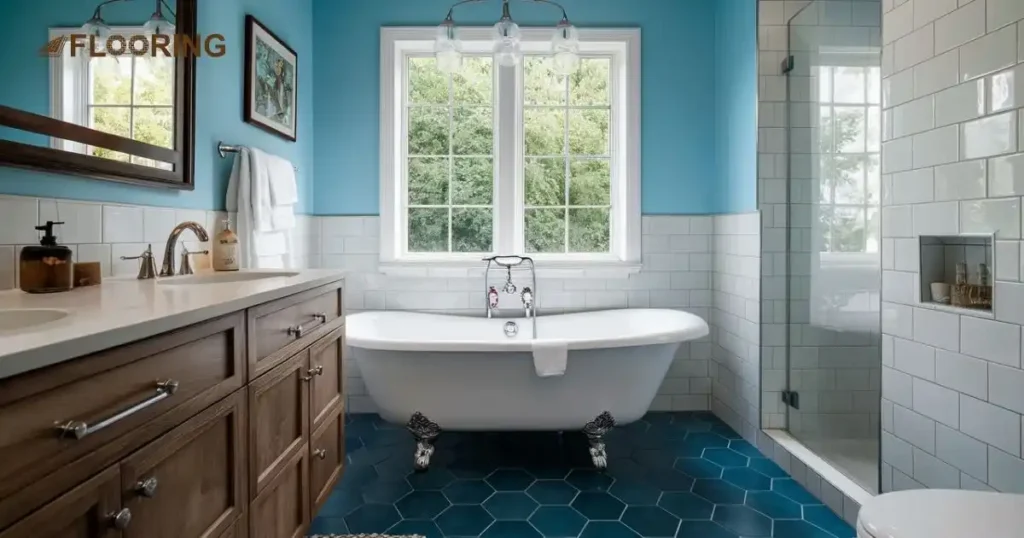
Create a spa-like atmosphere in your bathroom by transitioning from laminate to blue hexagonal tiles. Add a vintage clawfoot tub for extra charm. This combination of modern and classic elements results in a chic, relaxing space.
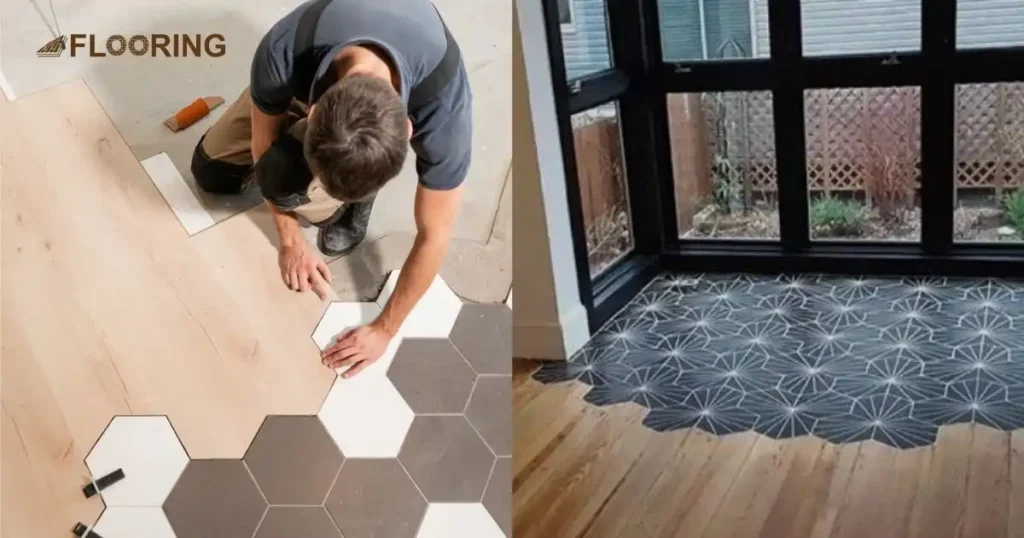
12. Irregular Hex Tile Transition
Embrace imperfection with an irregular hexagonal tile transition. This approach adds character and visual interest to your space. It’s perfect for those who want a more organic, less structured look in their home.
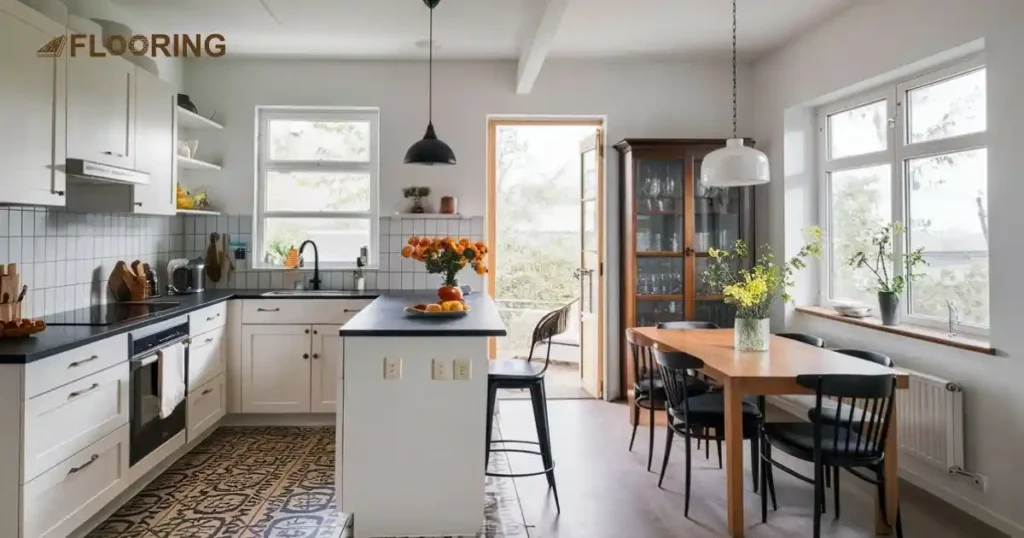
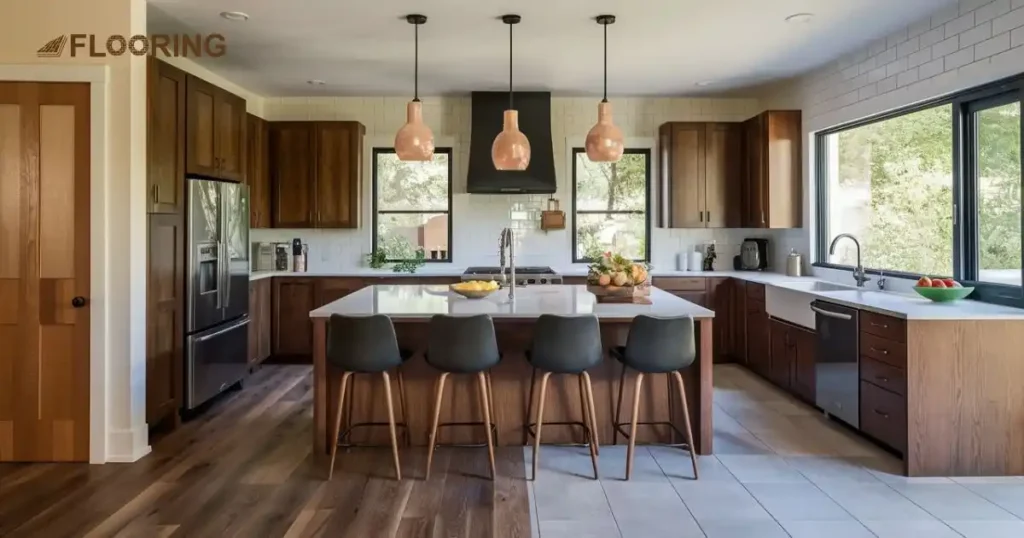
13. Wood and Tile Kitchen Transition
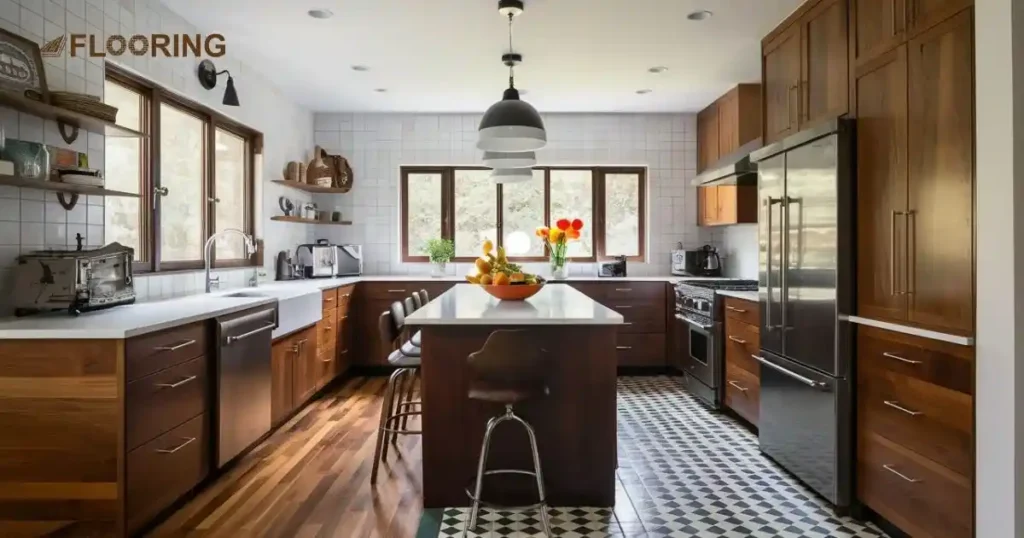
Blend old and new in your kitchen with a cool wood to tile floor transition. Add retro elements like vintage appliances or light fixtures to complete the look. This mix of styles creates a unique, personalized space that’s both functional and stylish.
14. Matte Black Tiles and Light Laminate
Use matte black tiles in your most walkable zones for a practical yet stylish solution. Transition to light-colored laminate in the rest of the space for contrast. This design choice is both functional and visually striking.
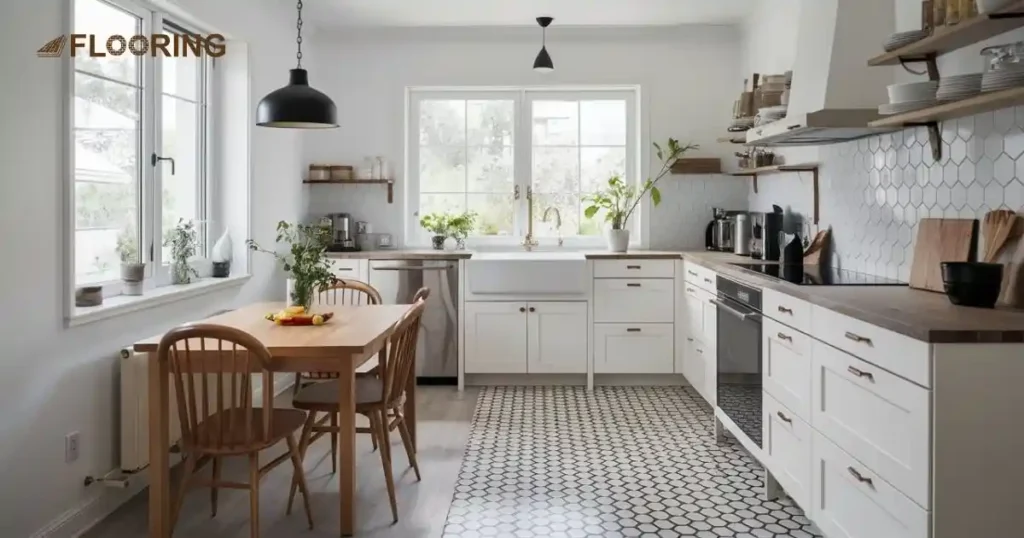
15. Grey and White Hex Tiles with Dark Laminate
Create visual interest in your cooking zone with grey and white hexagonal tiles. Contrast this with dark laminate in the surrounding areas. This combination adds depth and dimension to your kitchen while defining different functional spaces.
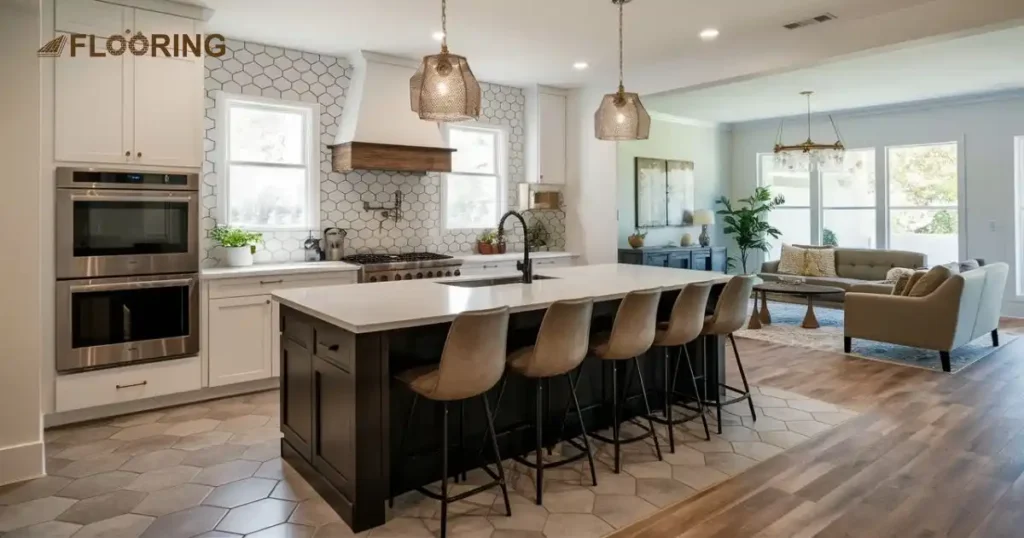
16. Patterned Tiles to Natural Wood Planks
Create a unique look with an irregular transition between patterned tiles and natural wood planks. This approach adds character and charm to your space. The mix of textures and patterns makes for an eye-catching floor transition idea that reflects your style.
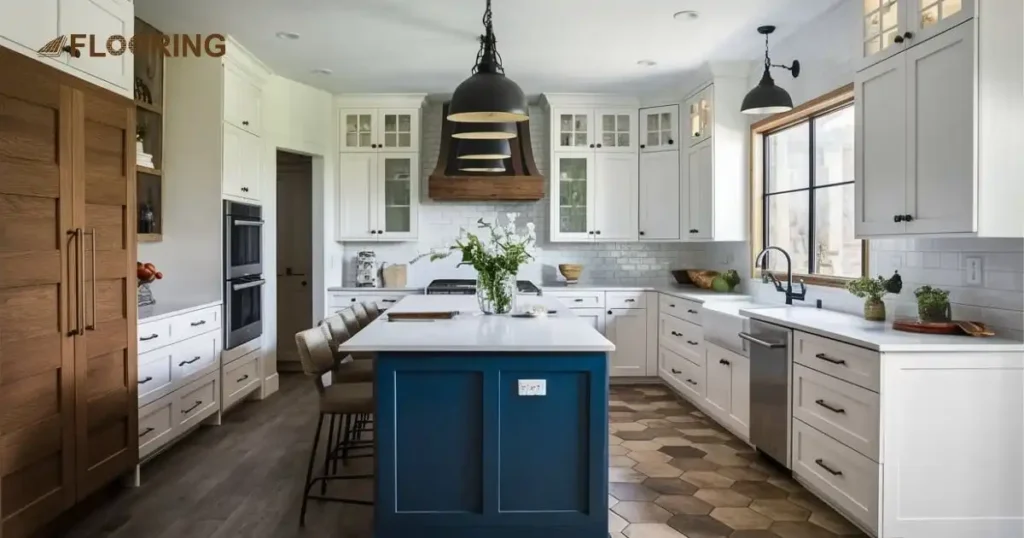
17. Blue Cabinetry with Mixed Flooring
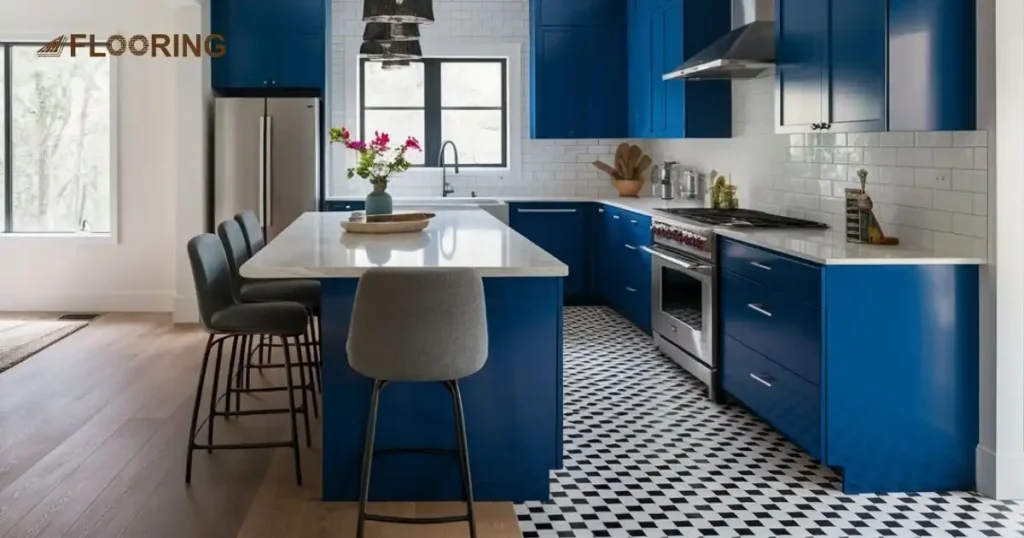
Make a statement in your kitchen with bold blue cabinetry and a striking floor transition. Use black and white tiles in the cooking area, transitioning to laminate in the dining space. This kitchen floor transition idea creates distinct zones while maintaining a cohesive look.
18. Hex Tiles to Laminate with a View
Transform your bathroom with a seamless transition from hexagonal tiles to laminate flooring. Place a bathtub near a window for a luxurious touch. This design allows you to enjoy a beautiful view while soaking, creating a spa-like experience at home.
19. Subtle Bathroom Transition
Craft a peaceful bathroom retreat with a subtle neutral design. Combine soft tones and elegant fixtures for a calming atmosphere. Use a gentle transition between flooring materials to maintain a serene feel throughout the space, promoting relaxation.
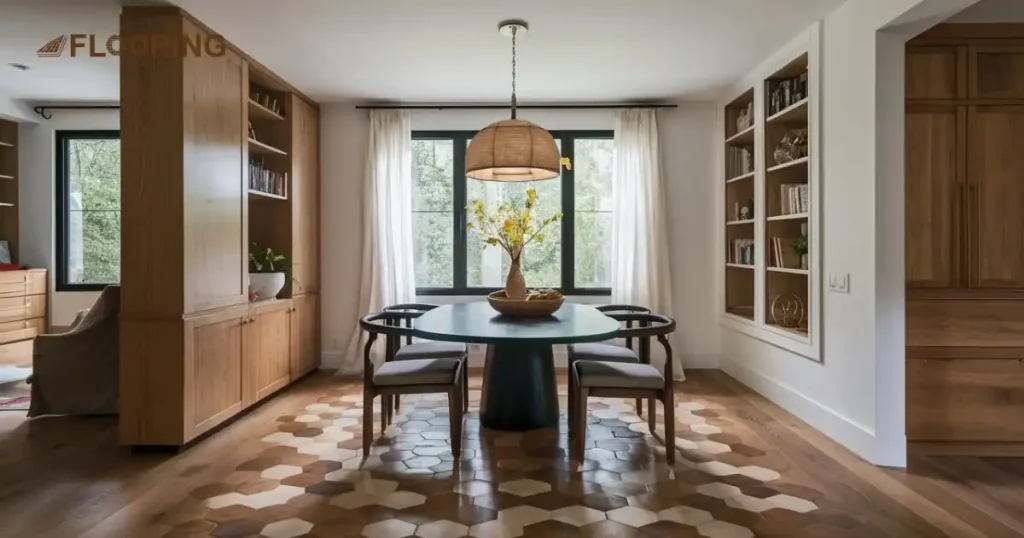
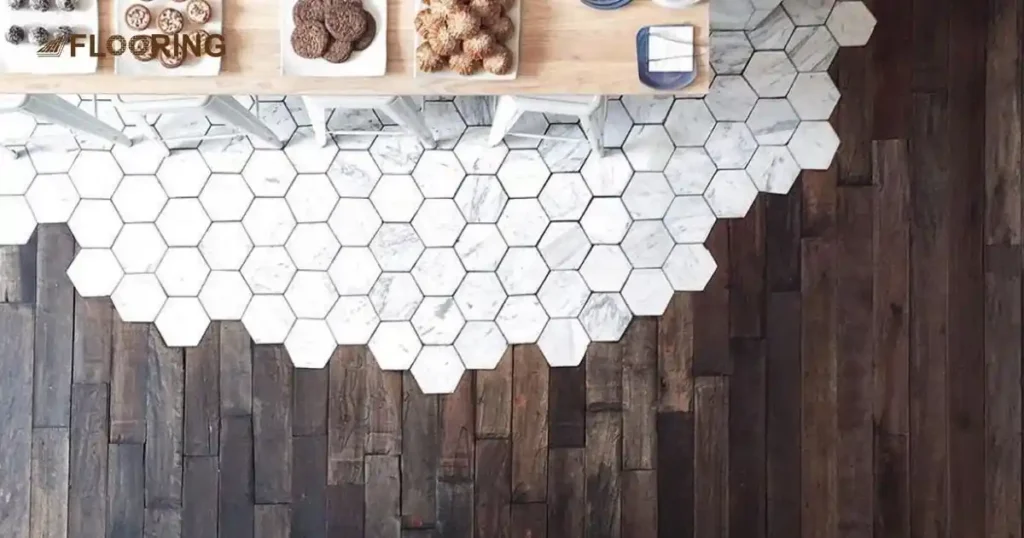
20. Hexagon Tiles and Hardwood
Blend hexagon tiles with hardwood floors for a modern, eclectic look. This combination adds visual interest and texture to your space. It’s perfect for defining different areas in open-concept homes, creating a seamless flow between rooms.
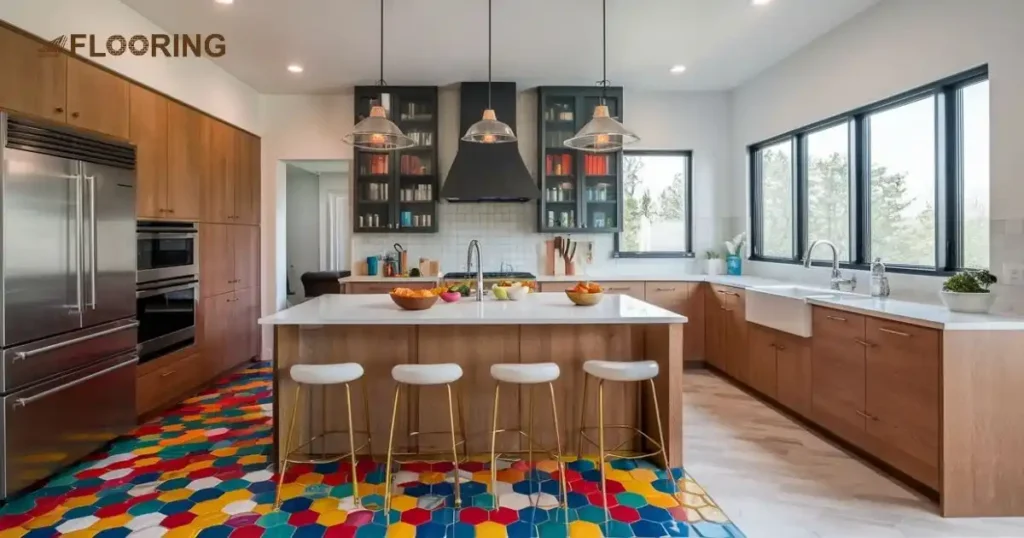
21. Colorful Tiles with Light Laminate
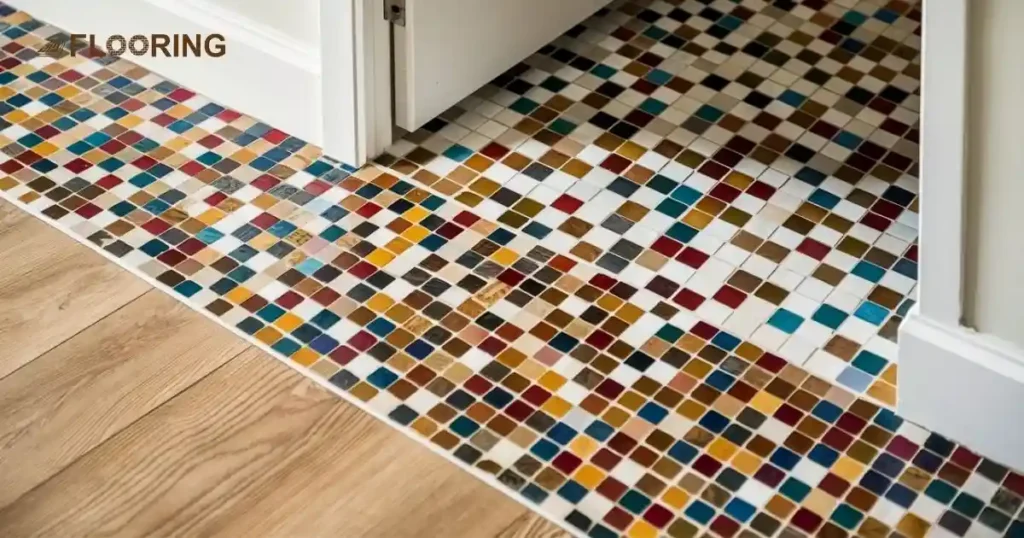
Add a burst of energy to your space with colorful mosaic tiles transitioning to light-colored laminate. This lively floor transition idea creates a focal point while keeping the surrounding areas neutral. It’s perfect for adding personality to entryways or kitchen backsplashes.
22. Bright Hex Tiles to Light Laminate
Brighten up your kitchen with vibrant hexagonal tiles that flow into a light-colored laminate. This kitchen floor transition idea creates a cheerful cooking zone while maintaining a neutral backdrop for the rest of the space. It’s a great way to add color without overwhelming the room.
23. Monochromatic Hex Tiles to Laminate
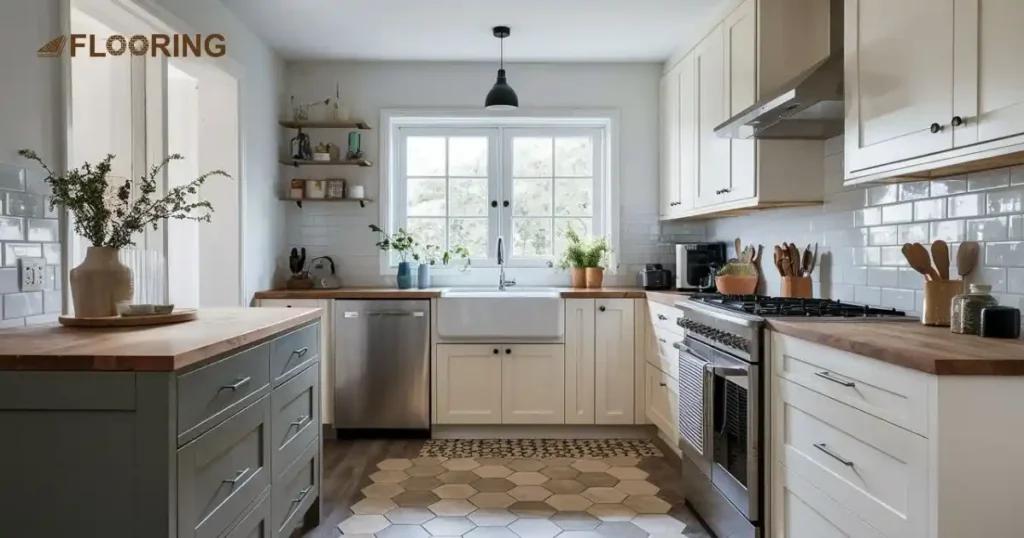
Embrace Scandinavian design with a white kitchen featuring butcherblock countertops and a monochromatic hexagonal tile floor. Transition to laminate for a cozy dining area. This clean, minimalist look creates a bright and inviting space for cooking and entertaining.
24. Black and White Hex Tiles to Rich Laminate
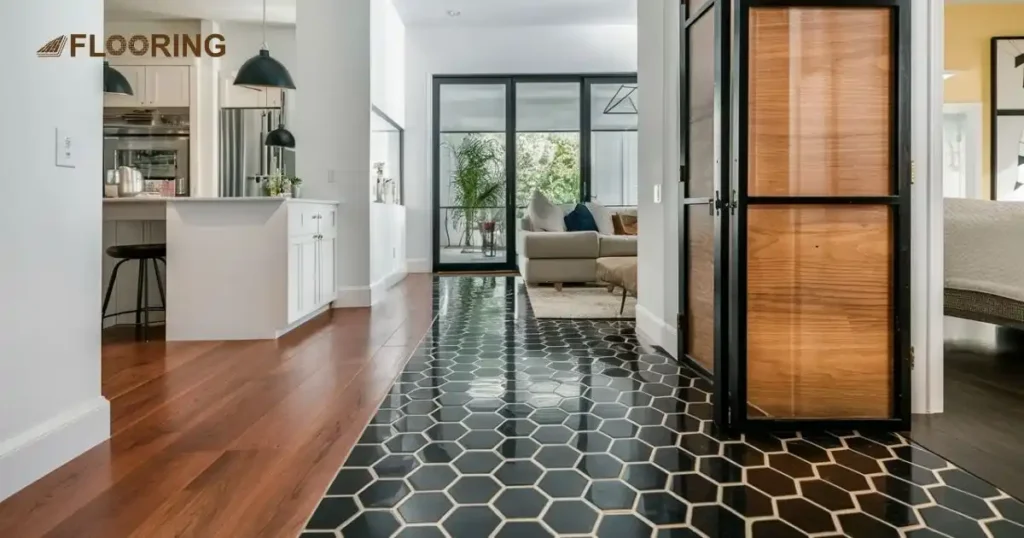
Create a stunning visual effect with black and white hexagonal tiles that gradually flow into rich-colored laminate. This tile-to-wood floor transition idea adds depth and interest to your space. It’s an excellent choice for open-concept areas where you want to define different zones subtly.
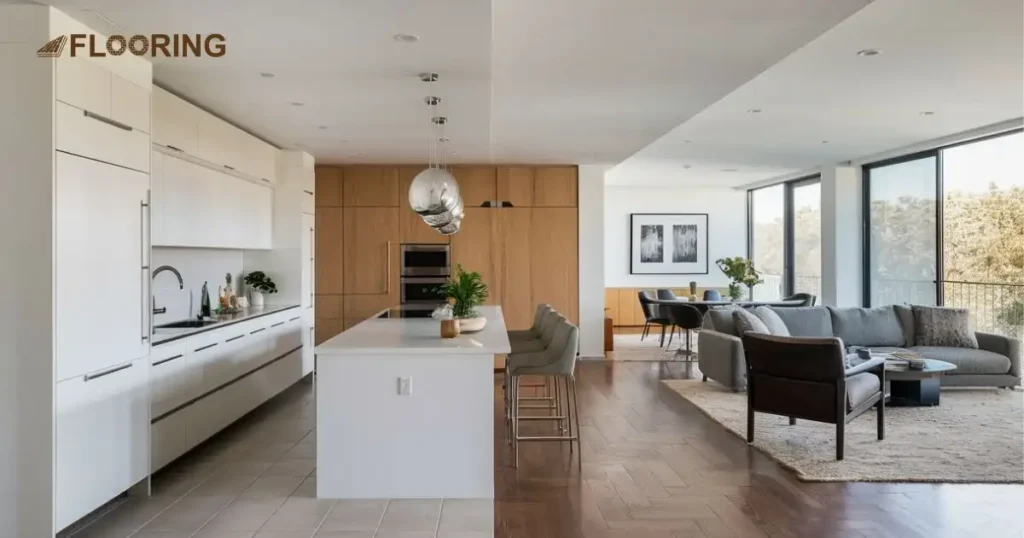
25. Kitchen to Living Room Flooring Transition
Blend modern and farmhouse styles with a white kitchen featuring grey subway tile backsplash and hexagonal tile flooring. Transition to laminate in adjacent zones for a warm, inviting feel. This kitchen-to-living room flooring transition idea creates a cohesive look throughout your home.
When connecting these two spaces, consider how the threshold matches your overall design, particularly if you have chosen hardwood for the living area.
26. Hex Tiles to Laminate with Butcherblock
Design a cool Scandinavian kitchen with white cabinets, butcherblock countertops, and a subway tile backsplash. Use hexagonal tiles that transition smoothly to laminate for a modern touch. This combination creates a bright, functional space that’s both stylish and practical.
27. Stained Kitchen with Printed Hex Tiles
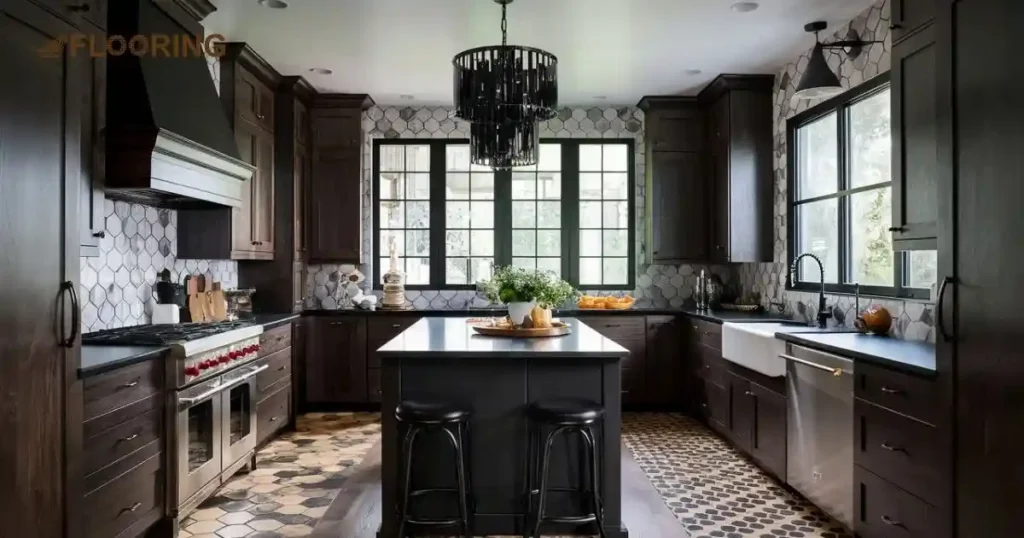
Add drama to your kitchen with dark-stained cabinets, black countertops, and a striking floor transition. Use laminate flooring that flows into printed hexagonal tiles for a bold look. A black crystal chandelier completes this luxurious and eye-catching design.
28. Dark Laminate to Marble Tiles
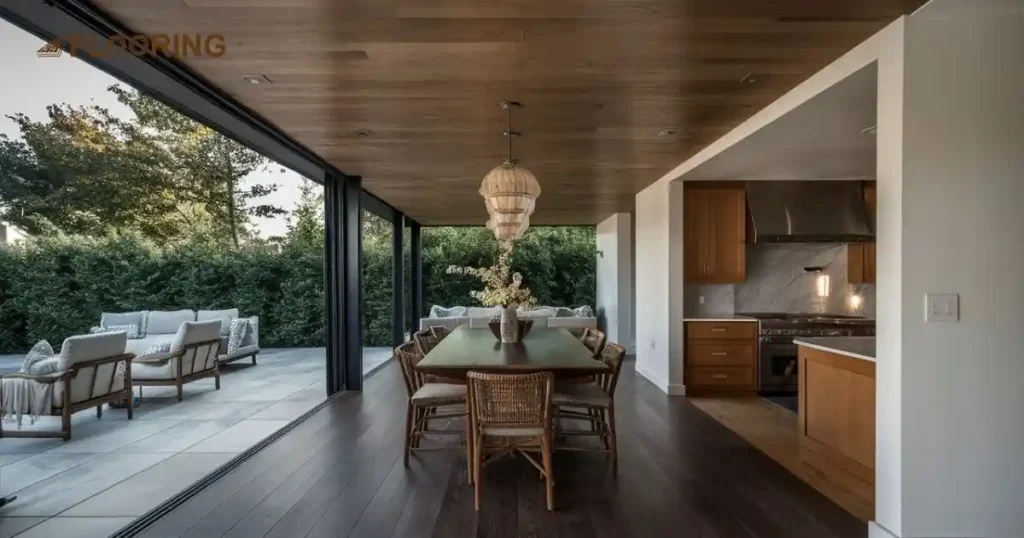
Create a seamless indoor-outdoor transition with dark laminate flooring that contrasts beautifully with marble tiles. This idea is perfect for areas leading to patios or balconies. It creates a smooth flow while defining interior and exterior spaces.
29. Renovation Revival – Hardwood to Tile Refresh
Give your space a new lease on life by refreshing your hardwood flooring with a tiled floor transition. This renovation project can breathe new life into your home, creating distinct zones and adding visual interest. It’s a great way to update your space without a complete overhaul.
30. Laminate to White Hex Tile
Design a contemporary neutral kitchen with light-stained cabinets and black countertops. Use a laminate to tile floor transition, moving from warm wood tones to crisp white hexagonal tiles. This creates a clean, modern look that’s perfect for open-concept living spaces.
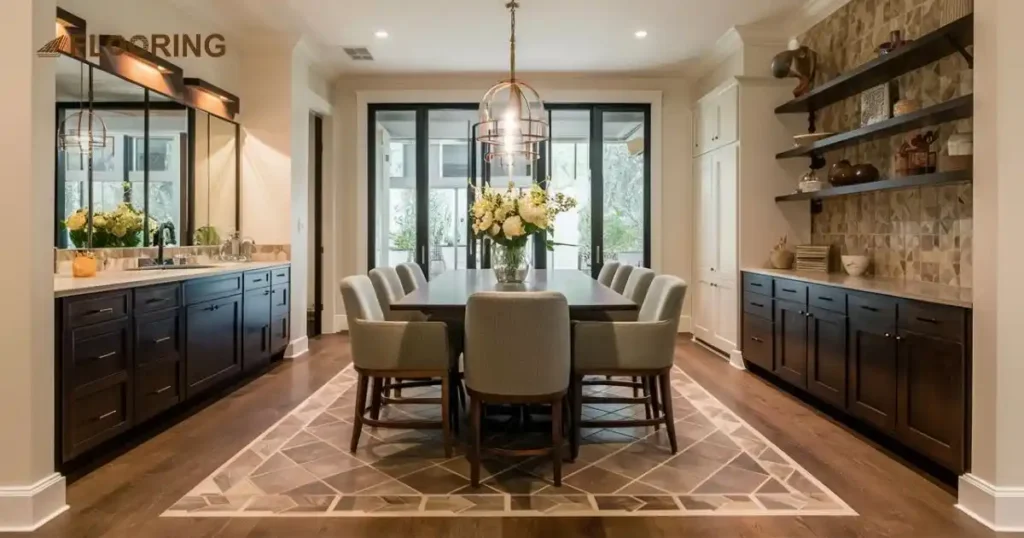
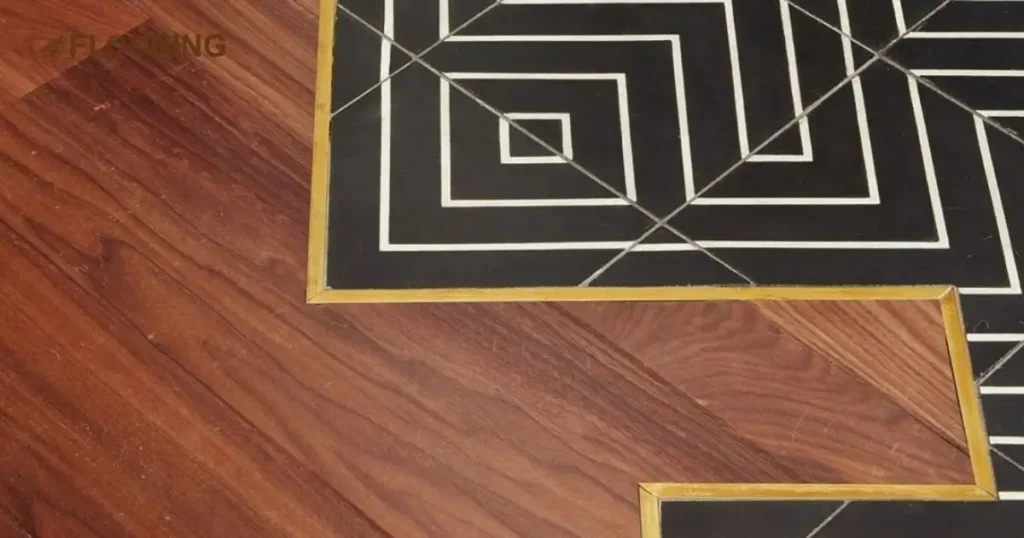
Make an Accent Border Between the Floors
Creating an accent border between different flooring types adds a stylish touch and makes the transition smoother and more cohesive.
31. Black and White Tile to Wood
Create a catchy modern white kitchen with upper and lower cabinets. Use a striking floor transition ideas tile to wood, featuring black and white tiles that flow into wooden flooring. This contrast adds depth and interest to your culinary space but make sure to get stains out of the hardwood floor first.
32. Tile to Laminate with Wood Border
Combine a checked tile floor with laminate flooring, separated by a stylish wood border. This unique floor transition idea creates a cohesive look that’s both eye-catching and practical. It’s perfect for defining different areas in open-concept homes.
33. Breakfast Nook Transition – Laminate Flow
Use a breakfast table to create a natural transition between laminate floors. This clever idea allows you to define your dining area without the need for different flooring materials. It’s a simple yet effective way to zone your space.
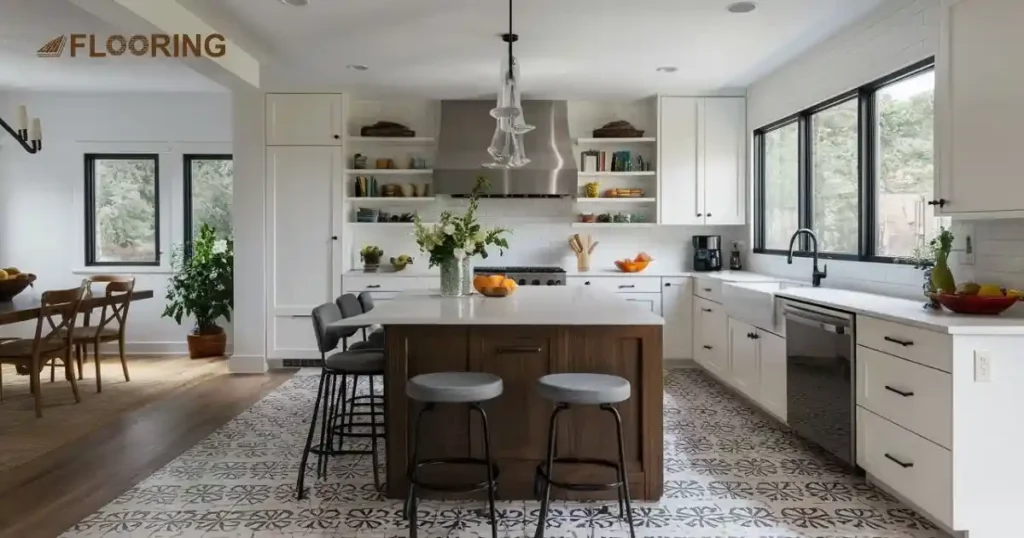
34. Cottage Kitchen Flow – Checked Tile to Laminate
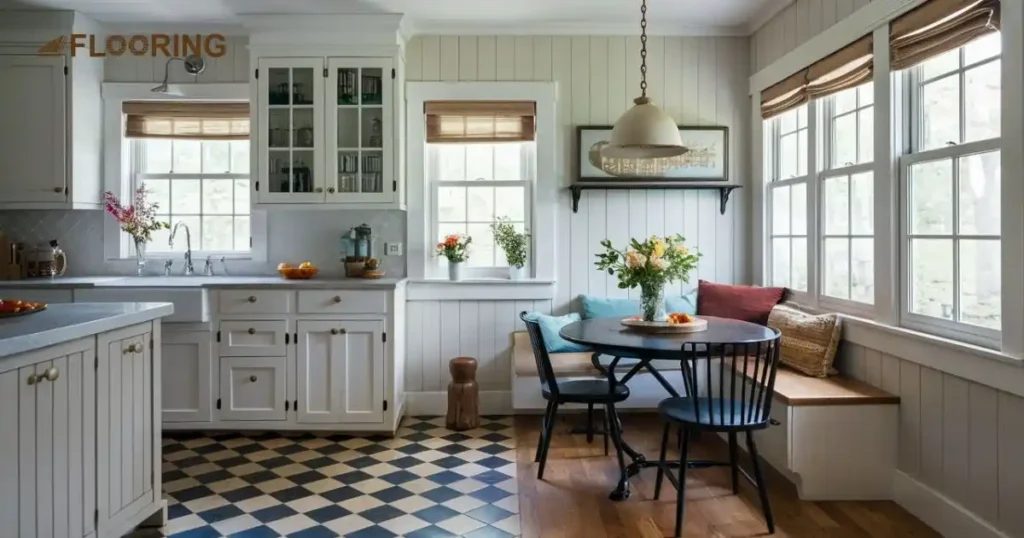
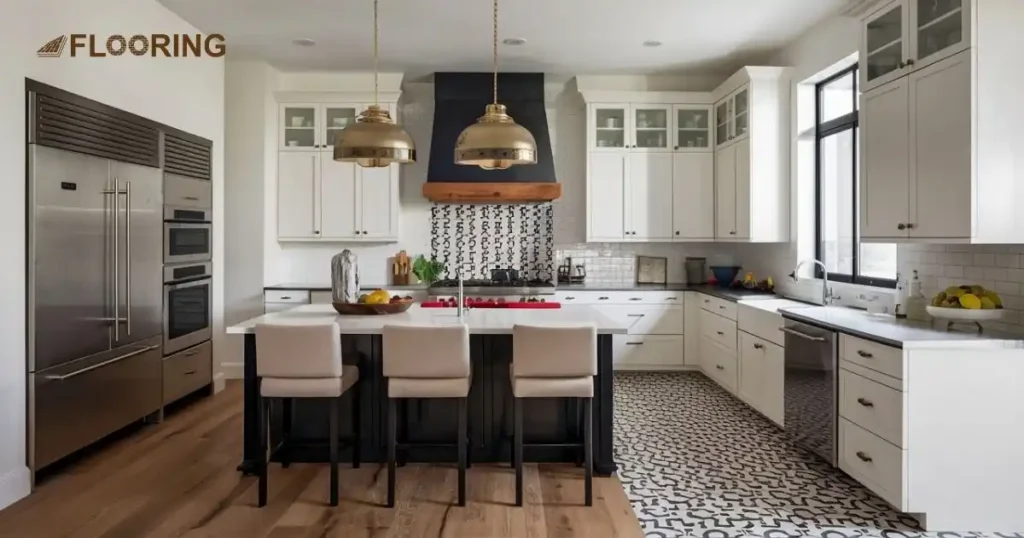
Design a charming cottage kitchen with white cabinetry and a checked tile floor that smoothly transitions into laminate. This kitchen to living room flooring transition idea creates a cozy, welcoming atmosphere. Place a dining zone by the window for added charm.
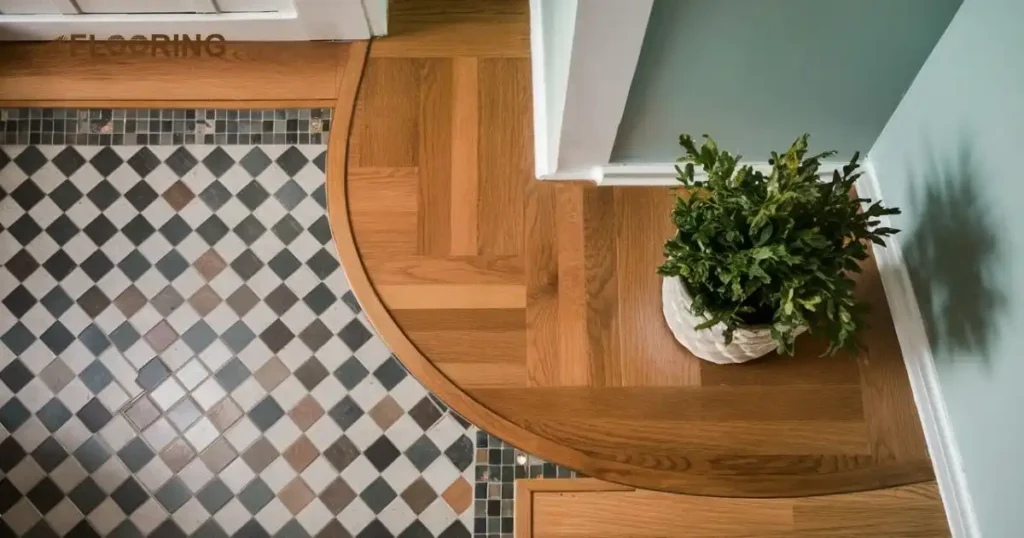
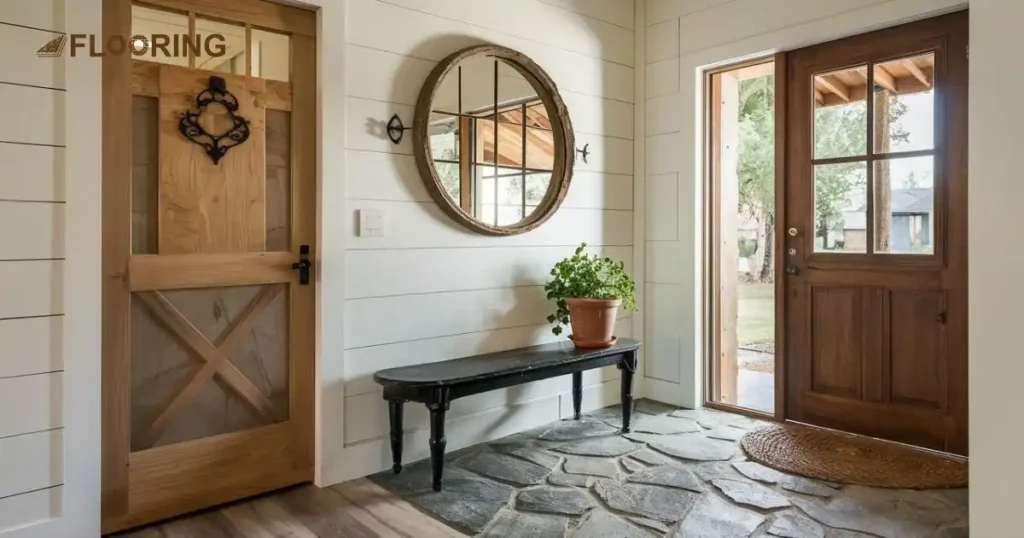
35. Farmhouse Entryway Stone Tile to Laminate
Create a welcoming farmhouse entryway with a floor transition ideas different heights. Use stone tiles that flow into laminate flooring. Add a black vintage bench and a potted plant for a touch of rustic charm.
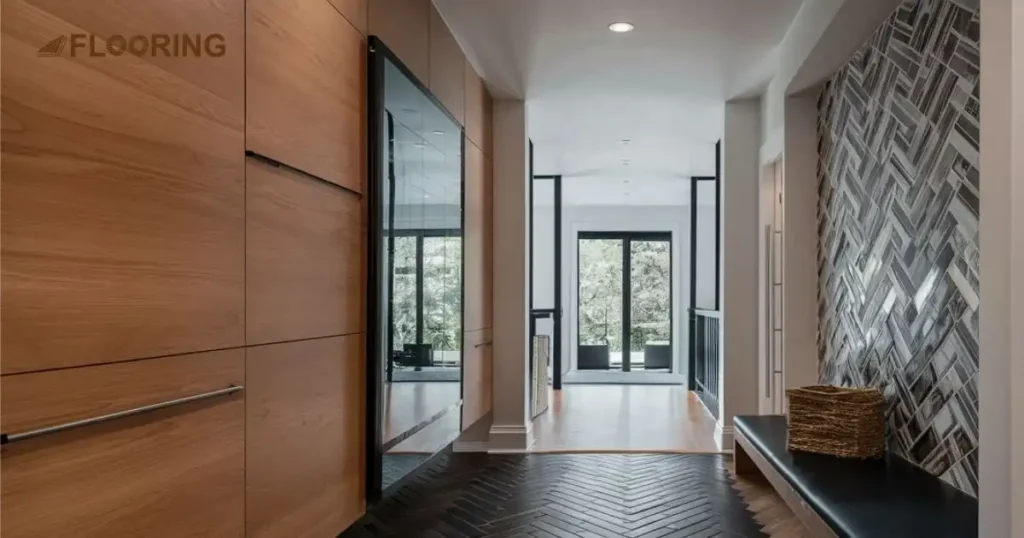
36. Modern Hallway Herringbone to Laminate
Design a sleek hallway with black herringbone tiles that transition smoothly into light-stained laminate. This modern approach creates a striking first impression without the need for borders. It’s perfect for contemporary homes seeking a bold entrance.
37. Black and White Tile to Laminate Light-Filled Transition
Brighten up your space with a black kitchen island and a tile to wood floor transition. Use black and white tiles that flow into warm laminate flooring. This creates a light-filled area that’s perfect for both cooking and dining.
38. Tile to Laminate Dining Zone
Craft a lovely Scandinavian kitchen with white cabinets and black countertops. Use a printed tile floor that transitions into laminate for the dining zone. This creates a distinct yet cohesive look in your open-concept space.
39. Sleek Black Kitchen – Printed Tile to Parquet
Design a modern black kitchen with sleek cabinetry and white accents. Use a floor transition ideas different heights with printed tiles flowing into parquet flooring. This creates a sophisticated look that’s both practical and stylish.
40. Boho Bliss – Laminate to Geo Tiles
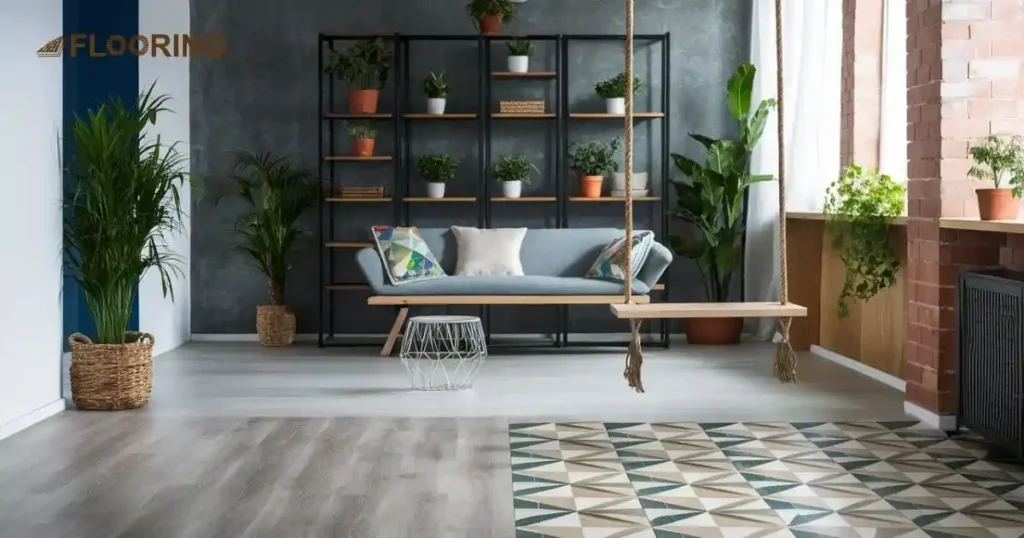
Create a modern boho space with a floor transition from laminate to geometric tiles. Add a large shelving unit with potted plants and a swing for a playful touch. This design creates a relaxed, eclectic atmosphere in your home.
41. Farmhouse Flair – Laminate to Hex Tiles
Design a modern farmhouse kitchen with white cabinetry and a blue kitchen island. Use a floor transition ideas tile to wood, moving from laminate to hexagonal tiles. Cool pendant lamps complete this charming, rustic-modern look.
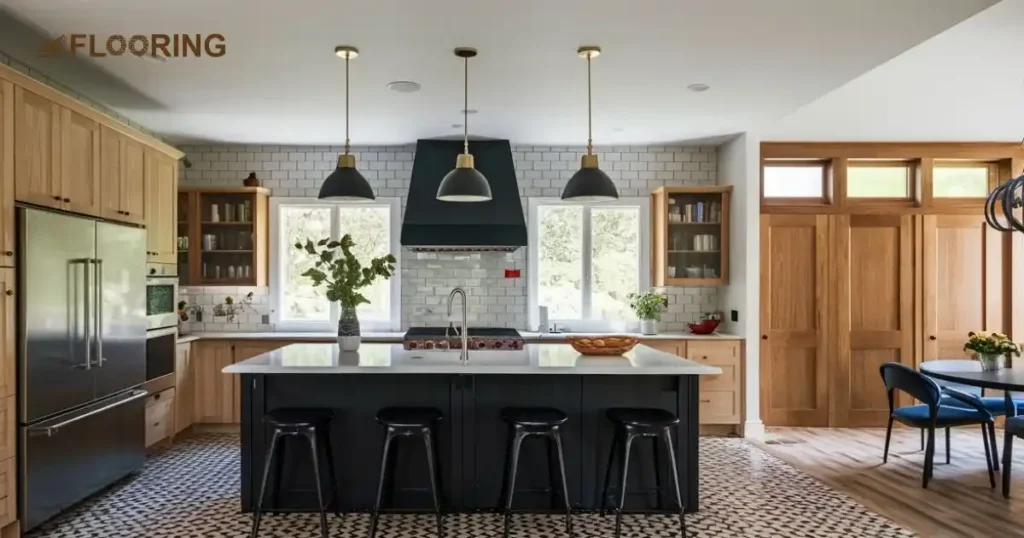
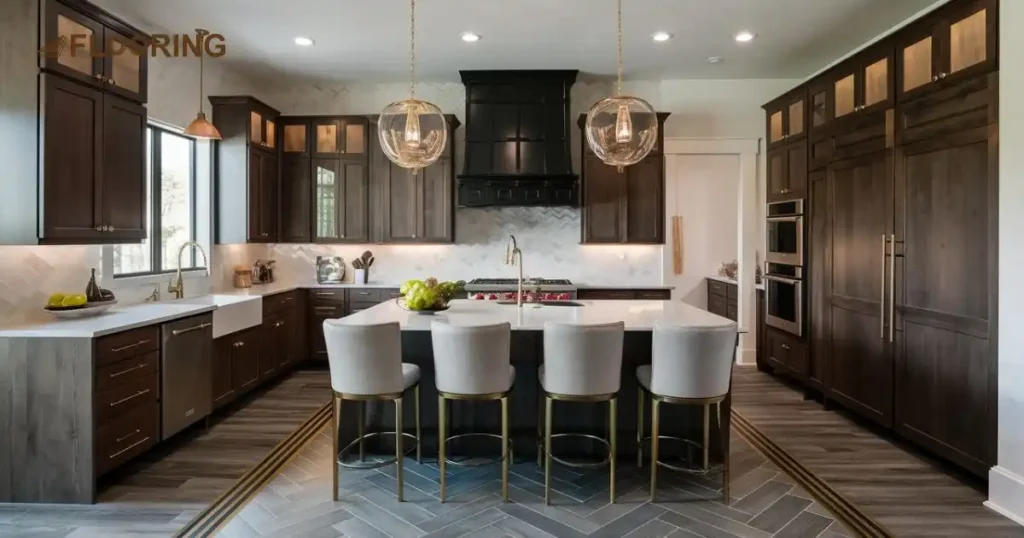
42. Island Boundary – Wood to Tile Transition
Use a kitchen island to mark the boundary between wooden and tile floors. This clever kitchen floor transition idea creates a natural divide between the cooking and dining areas. It’s a practical solution that adds style to your space.
43. Gold Accent Herringbone Tile to Laminate
Create a luxurious look with dark-stained cabinets and a black hood. Use a grey herringbone tile floor that transitions to laminate with a bold gold border. This elegant floor transition idea adds a touch of glamour to your kitchen.
44. Blue Backsplash Beauty – Tile to Parquet
Design a modern kitchen with white cabinets and a blue tile backsplash. Use a tiled floor that transitions to parquet in the adjacent zone creating a seamless flow between your kitchen and living areas.
45. Geometric Harmony Laminate to Geo Tiles
Craft a modern space with a floor transition from laminate to geometric tiles. Add stylish furniture and large windows for a bright, airy feel and this design creates distinct zones while maintaining a cohesive look.
46. Tile to Parquet – Open Concept Elegance
Create a modern open-concept space with white kitchen cabinetry. Use a tiled floor in the kitchen that flows into parquet in the living room. This open concept kitchen to living room floor transition idea defines different areas while maintaining visual harmony.
47. Concrete and Grey Tile to Laminate

Design a modern white kitchen with a concrete backsplash. Use a grey tile floor that transitions into laminate, adding a kitchen island for extra functionality. This creates a sleek, contemporary look in your culinary space.
48. Seamless Style Printed Tile to Laminate
Craft a modern white kitchen with a printed tile floor and a kitchen island. Let the tiles flow seamlessly into laminate flooring without a border. This creates a smooth, uninterrupted look in your open-concept space.
49. White Chevron Tile and Oak Wood
White chevron tile and oak wood transitions exude elegance and sophistication. This combination is ideal for entryways and hallways, where a striking first impression is essential. Using a thin metal strip or a coordinating wooden edge can enhance the seamless integration of these two materials.
50. Hex Tile and Light Laminate
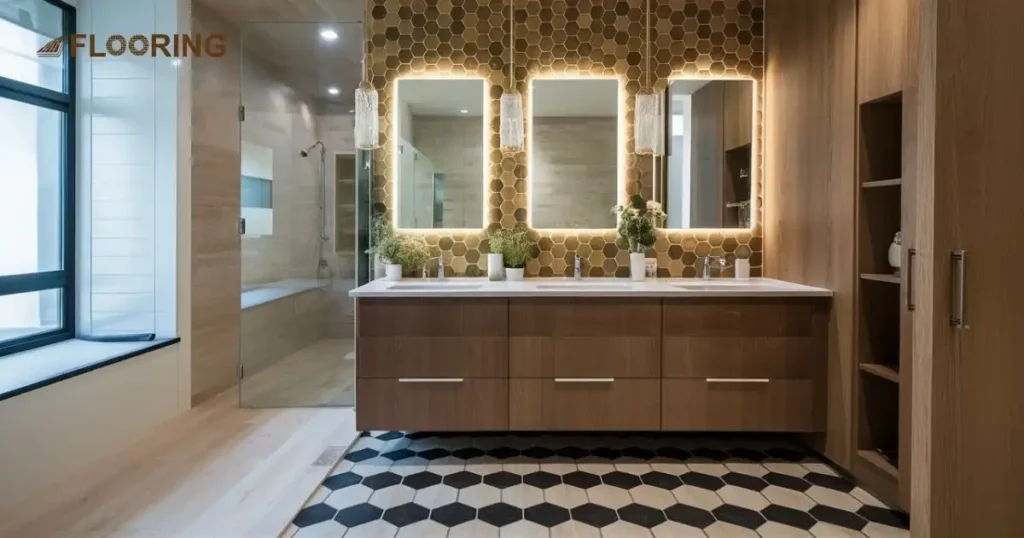
Hex tile and light laminate transitions offer a fresh and contemporary look. This pairing is particularly effective in bathrooms and laundry rooms, where durability and style are crucial. To achieve a smooth transition, use a coordinating strip that matches the color of the hex tile, creating a cohesive and modern appearance.
Why Floor Transitions Matter in 2024
Floor transitions are more than just functional elements; they are critical for enhancing the overall aesthetic and flow of a space. In 2024, the focus is on creating seamless and stylish transitions that add value and visual appeal.
With open-concept living becoming more popular, the need for smooth transitions between different flooring types is paramount. Proper floor transitions ensure safety by preventing tripping hazards and accommodating changes in flooring height, making spaces more accessible.
They also contribute to the overall design theme, allowing for creative expressions and personalized touches.
Make the Transition Irregular
Unique Patterns: Use irregular transition patterns to create a unique and artistic floor design.
Visual Interest: Add visual interest by mixing different shapes and sizes of tiles or planks.
Define Spaces: Use irregular transitions to define distinct areas within an open-concept space.
Contrasting Colors: Combine contrasting colors and materials for a bold and eye-catching look.
Natural Flow: Create a natural flow between rooms by mimicking organic shapes and lines.
Customization: Tailor the transition to match your personal style and the overall theme of your home.
Highlight Features: Use irregular transitions to highlight architectural features or focal points in a room.
Seamless Integration: Achieve a seamless integration of different flooring types by carefully planning the transition layout.
Budget-Friendly: Opt for irregular transitions as a cost-effective way to use leftover materials and reduce waste.
Timeless Appeal: Embrace irregular transitions for a timeless and unique design that stands out.
Trends in Floor Transition Design
Floor transition design is evolving rapidly in 2024, with homeowners seeking both style and functionality. From sleek minimalist approaches to bold statements, the trends reflect our changing tastes and needs.
Minimalist Transitions
Minimalist transitions are perfect for those who prefer a clean and understated look. These transitions use simple, elegant strips or even no strips at all to blend different flooring materials.
The key is to match colors and textures closely to create a seamless flow. Minimalist transitions work well in modern and contemporary spaces, providing a sophisticated and uncluttered appearance.
Bold and Decorative Transitions
On the other hand, bold and decorative transitions add personality and flair to your home. These transitions use vibrant colors, intricate patterns, and unique materials to make a statement. They can serve as focal points in a room, drawing attention and sparking conversation.
This trend is perfect for those who want to express their creativity and style through their flooring choices.
Eco-Friendly Transition Options
As sustainability becomes a priority, eco-friendly floor transitions are gaining traction. These options not only look great but also minimize environmental impact. These transitions use materials like bamboo, cork, or recycled tiles to connect different flooring types.
Not only do these options reduce environmental impact, but they also bring a natural and warm feel to your home.
Common Floor Transition Challenges

Floor transitions can present several challenges that need careful consideration. From dealing with uneven floors to bridging different heights, these issues can impact the overall look and functionality of your space. Below, we explore solutions for some of these common challenges.
Dealing with Uneven Floors
- Use Transition Strips: Install transition strips to bridge the gap between uneven floors.
- Self-Leveling Compound: Apply a self-leveling compound to smooth out the differences.
- Gradual Slope: Create a gradual slope to transition smoothly between different heights.
- Underlayment: Use an underlayment to level the subfloor before installing the final flooring.
- Tapered Transition Strips: Opt for tapered transition strips for a more gradual and subtle change.
- Custom Solutions: Consider custom-built transitions for unique and challenging areas.
- Professional Help: Seek professional help if the unevenness is significant and complex.
- Flexible Materials: Use flexible transition materials that can adapt to slight variations in height.
- Visual Design: Incorporate the unevenness into the design for a unique aesthetic.
- Regular Maintenance: Ensure regular maintenance to keep the transition area in good condition.
Bridging Different Floor Heights
- Reducer Strips: Install tapered strips to create a smooth slope between floors of different heights.
- Step-Down Transitions: Use a small step or threshold to bridge more significant height differences safely.
- Custom Milling: Have wood flooring custom-milled to create a seamless transition between different heights.
- Floating Floor Adjustment: Adjust the underlayment thickness of floating floors to match adjacent floor heights.
- Tile Build-Up: Use additional thin-set mortar to build up tile floors to match adjacent flooring heights.
Transitioning Between Different Materials
Transitioning between different flooring materials requires careful consideration. Here’s a table outlining common material combinations and suitable transition methods:
| Material Combination | Transition Method |
| Wood to Tile | T-molding or custom wood threshold |
| Carpet to Hardwood | Metal edge strip or wooden threshold |
| Tile to Laminate | Reducer strip or T-molding |
| Vinyl to Carpet | Metal edge strip or transition vinyl |
| Hardwood to Concrete | Reducer strip or custom wooden threshold |
| Tile to Concrete | Sloped metal strip or gradual mosaic transition |
| Laminate to Carpet | T-molding or metal edge strip |
| Wood to Wood (different types) | Flush transition or decorative inlay |
Common Floor Transition Mistakes to Avoid

Avoiding common floor transition mistakes is essential for a smooth and attractive finish.
- One major mistake is neglecting to plan the transition during the initial design phase. This oversight can lead to awkward and unattractive transitions that disrupt the flow of the space.
- Another mistake is using the wrong transition materials, which can cause durability issues and mismatched aesthetics.
- It’s also important to ensure that transitions are level to prevent tripping hazards and ensure a seamless appearance.
- Not considering the movement and expansion of flooring materials can result in gaps or buckling over time.
- Rushing the installation process without proper preparation can lead to poor results.
Taking the time to plan, select the right materials, and execute carefully will help you avoid these common pitfalls.
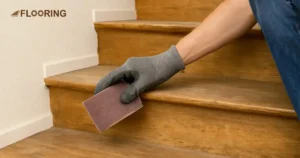
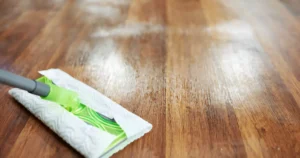
Floor Transition Maintenance Tips
Regular Cleaning: Keep the transition areas clean to prevent dirt buildup.
Check For Damage: Inspect regularly for any signs of wear or damage.
Repair Promptly: Fix any issues as soon as they are noticed to prevent further damage.
Use Proper Cleaners: Use appropriate cleaners for the materials to avoid damage.
Avoid Water Accumulation: Ensure that water does not accumulate around the transition areas.
Reapply Sealant: Reapply sealant if needed to maintain the durability of the transition.
Protect From Heavy Traffic: Use rugs or mats in high-traffic areas to protect the transitions.
Monitor Movement: Check for any signs of movement or gaps in the transition.
Consult Professionals: Seek professional help for maintenance if necessary.
Follow Manufacturer Guidelines: Always follow the manufacturer’s maintenance recommendations for the best results.
Frequently Asked Questions
How do you make floor transitions look good?
To make floor transitions look good, choose materials that complement each other in color and texture. Ensure the transition is smooth and level to create a seamless and professional appearance.
What is the best transition for flooring?
The best transition for flooring depends on the materials and the height difference. T-molding is ideal for equal heights, while reducers work well for uneven floors.
Are floor transitions necessary?
Yes, floor transitions are necessary to create a smooth, safe passage between different flooring types. They prevent tripping hazards and add a finishing touch to the overall design.
What is the best adhesive for floor transitions?
The best adhesive for floor transitions is a strong construction adhesive that works on both flooring types. Ensure it is suitable for the materials being joined for a secure hold.
What is transitional style flooring?
Transitional style flooring blends traditional and contemporary elements, creating a balanced and timeless look. It often features neutral colors and classic patterns that adapt well to various decor styles.
Conclusion
Now floor transitions are more than just functional; they are a key design element. Whether you prefer minimalist styles or bold statements, the right transition can enhance your space. From tile to wood floor transitions to unique patterns, the possibilities are endless.
From eco-friendly options to decorative strips, there’s something for everyone. Discover these 50 amazing floor transition ideas in 2024 and let your creativity flow. A well-chosen transition not only enhances the look of your space but also adds value to your home.