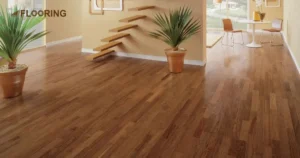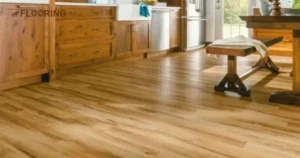
Stagger Laminate Flooring is crucial in ensuring your flooring looks great and lasts long. But did you know improper staggering can lead to floor cupping and other issues? This not only looks unsightly but also reduces the lifespan of your flooring. If you’re tired of dealing with such problems, it’s time to learn how to stagger your laminate flooring.
By following the right techniques and tips, you can ensure a beautiful and durable finish that will make your home look amazing. In this article, we will guide you through the process of stagger laminate flooring. It will cover everything from preparing the subfloor to installing the final row. With these simple steps, you can avoid common mistakes and achieve a stunning finish.
📑 Table of Content
Key Takeaways
- Staggering laminate flooring adds a touch of elegance and sophistication to your home.
- Measure the room and calculate the plank widths to ensure a smooth installation.
- Choose the right underlayment for your laminate flooring to ensure durability.
- Before installation, acclimate the laminate planks to the room humidity and temperature.
- Lay the first row of planks along the longest wall in the room for a professional finish.
- Stagger the planks by at least 1/4 inch to ensure a strong and durable installation.
- Use a chalk line to mark the location of the next plank for a precise installation.
- Trim the last row of planks to fit around obstacles and ensure a smooth finish.
- Regularly clean and maintain your laminate flooring to prevent damage and wear.
- Avoid common mistakes like ignoring manufacturer instructions and skipping the underlayment to ensure a successful installation.
Why Staggering of Laminate Flooring is Important?

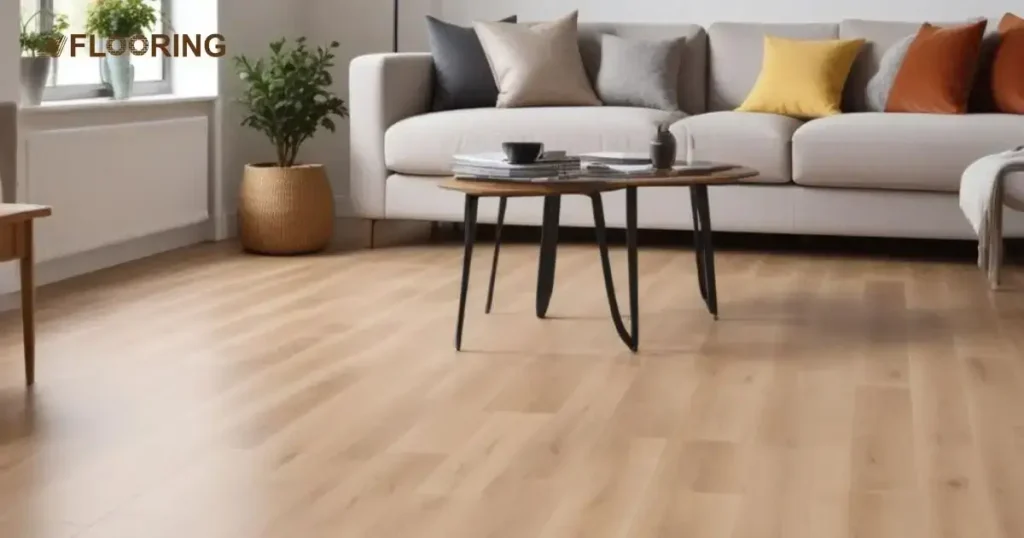
Staggering laminate flooring is important for several reasons. First and foremost, it enhances the overall look of your floor. When you stagger the planks, it creates a visually appealing pattern that adds depth and dimension to your room. This makes your space look more polished and professional, which can significantly improve the value of your home.
Likewise, staggering the planks helps to distribute the weight evenly across the floor. This is particularly important in high-traffic areas where the floor is subjected to constant pressure. By staggering the planks, you can prevent the formation of unsightly gaps and cracks, which can occur when the floor is not properly supported.
Benefits of Staggering Laminate Flooring
Staggering laminate flooring offers numerous benefits that can significantly enhance the overall look and performance of your floor. Here are some of the key advantages of staggering laminate flooring:
Improved Aesthetics
Staggering laminate flooring reduces gapping between planks, ensuring a more durable and stable floor. This technique prevents moisture damage by allowing the flooring to expand and contract naturally. Staggering laminate flooring increases the life of your floor by reducing the risk of damage and wear.
Enhanced Durability
Staggering laminate flooring reduces gapping between planks, ensuring a more durable and stable floor. This technique prevents moisture damage by allowing the flooring to expand and contract naturally. Staggering laminate flooring increases the life of your floor by reducing the risk of damage and wear.
Easier Installation
Staggering laminate flooring simplifies the installation process, making it easier to achieve a professional-looking finish. This technique reduces errors during installation, ensuring a more accurate and efficient process. Staggering laminate flooring saves time during installation, allowing you to complete the project faster.
Improved Floor Strength
Staggering laminate flooring increases the stability of your floor, reducing the risk of damage and wear. This technique enhances the structural integrity of your floor, making it more durable and long-lasting. Staggering laminate flooring reduces the risk of damage to your floor, ensuring it remains strong and stable over time.
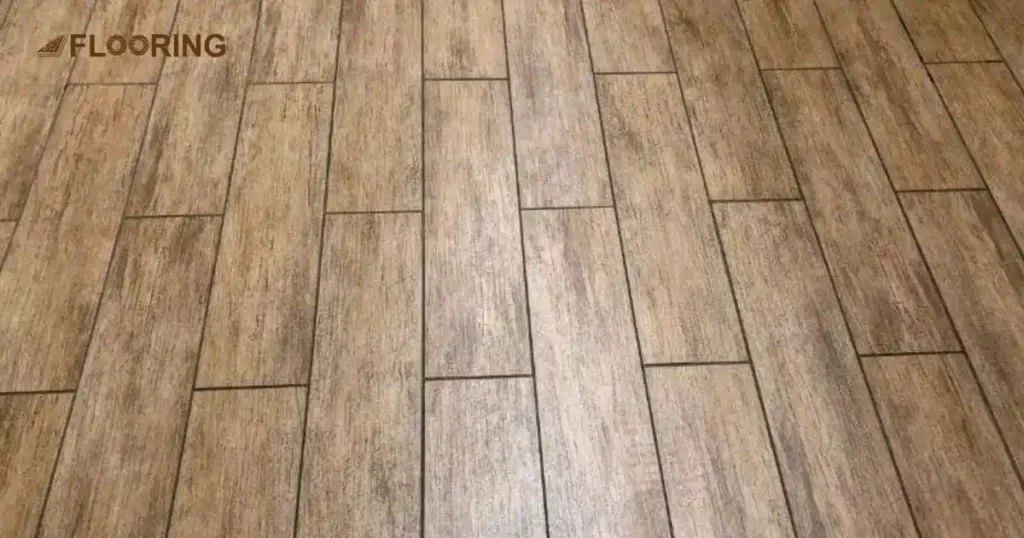
Types of Stagger Laminate Flooring

There are two primary types of staggering laminate flooring to consider: random staggered and uniform staggering. Each type has its unique benefits and can be used to achieve a specific look or style.
Random Staggered Laminate Flooring
- Random staggering creates a unique and visually appealing pattern that adds depth and dimension to your room.
- This type of pattern mimics the natural look of hardwood flooring, making it a popular choice for those who want a more authentic appearance.
- Random stagger flooring pattern can create a sense of movement and energy in a room, making it more visually appealing.
- Random staggering allows for more flexibility in terms of plank placement and orientation, making it easier to work around obstacles.
- The unique pattern can create a cozy and inviting ambiance in a room, making it feel more welcoming and comfortable.
Uniform Staggering of Laminate Floors
- Uniform staggering creates a consistent and uniform look that is easy to maintain and clean.
- This staggering makes the installation process easier and faster, as you can simply follow a consistent pattern.
- It reduces the risk of installation errors, as you can follow a consistent pattern and avoid mistakes.
- Uniform staggering can reduce waste by allowing you to cut planks to fit around obstacles and irregularities.
- This staggering makes maintenance easier, as you can simply follow a consistent pattern and avoid mistakes.
Choosing the Right Stagger Laminate Flooring

Choosing the right stagger laminate flooring can be a difficult task, especially with the numerous options available. By considering a few key factors, you can ensure that you select the perfect flooring for your home.
Considering Room Size
When choosing the right stagger laminate flooring, it is essential to consider the size of your room. Larger rooms can accommodate a random staggered pattern. On the other side, smaller rooms may benefit from a uniform stagger.
Because a random stagger can create a sense of movement and energy in a larger space. At the same time, a uniform stagger can develop an understanding of order and harmony in a smaller space.
Matching Existing Decor
Another crucial factor to consider is matching the flooring to your existing decor. The flooring should complement the color scheme, style, and overall aesthetic of your room.
For example, if you have a modern and sleek living room, you may want to choose flooring that has a clean and minimalist design. On the other hand, if you have a traditional and ornate dining room, you may want to choose flooring that has a more classic and elegant design.
Tools and Materials Needed for Staggering Laminate Flooring
When it comes to staggering laminate flooring, having the right tools and materials is essential for a successful and efficient installation. Whether you’re a seasoned DIY enthusiast or a first-time floor installer, having the right equipment can make all the difference in achieving a professional-looking finish. Here are the essential tools and materials you will need to get started:
Essential Tools for Staggering Laminate Flooring
- Tape Measure
- Pencil
- Safety Glasses
- Knee Pads
- Hammer
- Pull Bar
- Spacers
- Tapping Block
Measuring and Cutting Tools Required for Stagger Laminate Floors
- Circular Saw
- Jigsaw
- Table Saw
- Utility Knife
- Miter Saw
- Flooring Cutter
- Straight Edge
- Laminate Shears
Installation Accessories You Need
- Underlayment
- Adhesive Tape
- Moisture Barrier
- Installation Kit
- Transition Strips
- Floor Cleaner
- Repair Kit
- Expansion Foam
Necessary Materials for Staggering Laminate Floors
- Laminate Flooring Planks
- Underlayment Sheets
- Nails or Screws
- Wood Glue
- Sealer
- Thresholds
- Caulk
- Floor Protectors
Preparing the Subfloor for Stagger Laminate Flooring
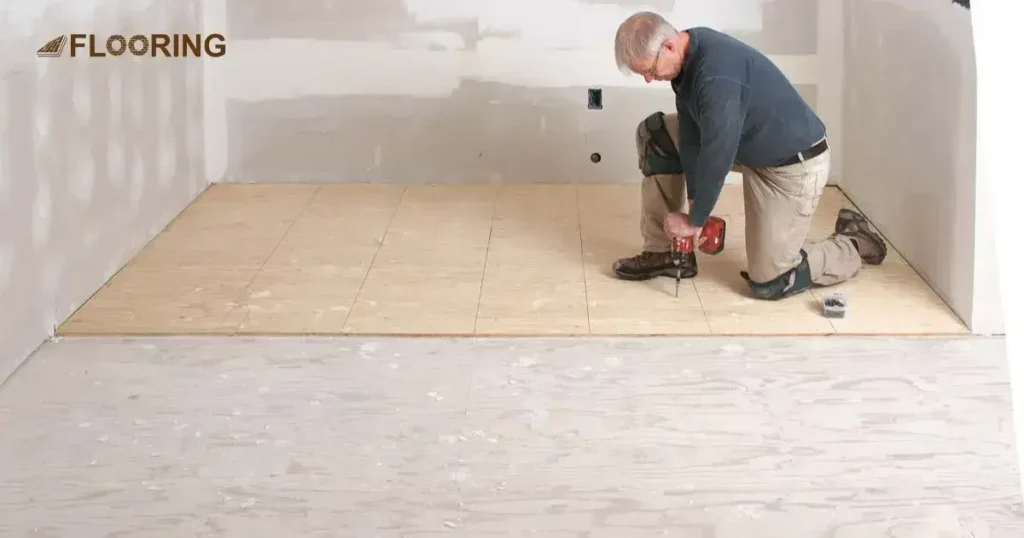
Preparing the subfloor for stagger laminate flooring is a crucial step that ensures a smooth and level surface. This process involves cleaning and leveling the subfloor, installing underlayment, and acclimating the laminate planks.
If you are dealing with old flooring, read our guide on installing hardwood over carpet.
Cleaning and Leveling the Subfloor
Cleaning and leveling the subfloor is the first step in preparing it for stagger laminate flooring. This involves removing any dirt, dust, or debris from the subfloor and ensuring it is level and even.
Use a broom or vacuum to clean the surface, and check for any uneven areas with a level. If you find any dips or bumps, use a floor leveling compound to smooth them out. This step is vital for a smooth and even installation of laminate flooring.
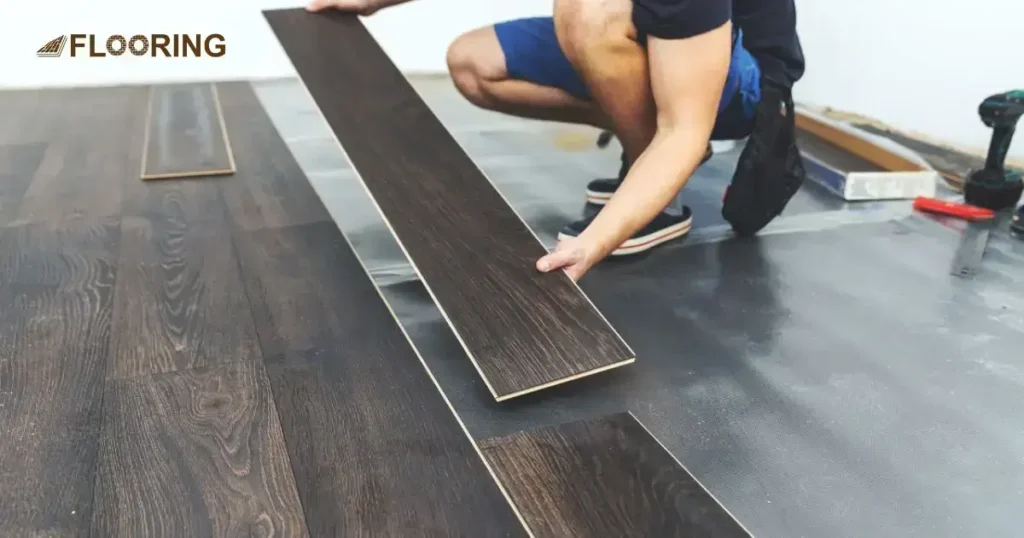
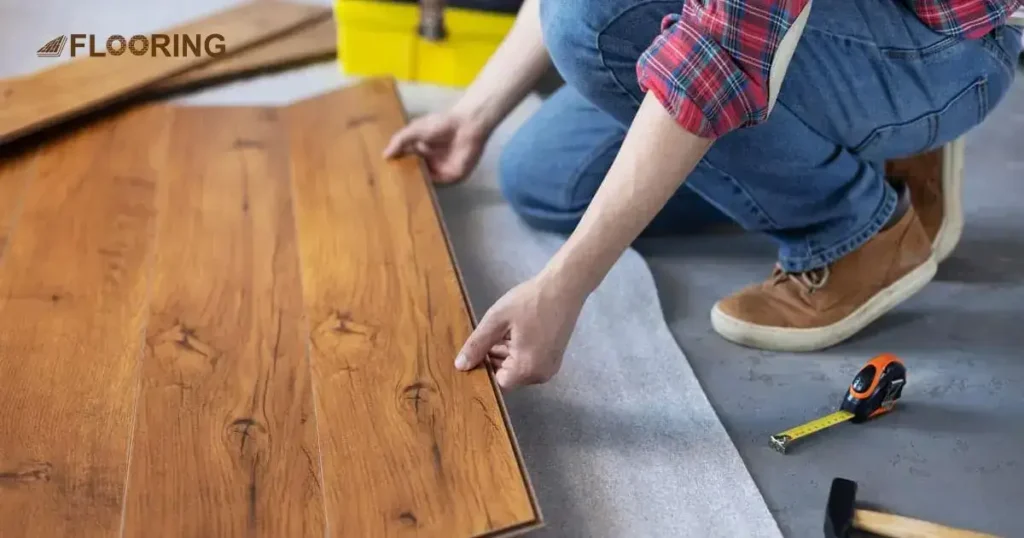
Underlayment Installation
After cleaning and leveling the subfloor, it’s time to install the underlayment. Underlayment is a thin layer that goes between the laminate planks and the subfloor. It provides cushioning, insulation, and moisture protection.
Acclimating the Laminate Planks
Before you can start installing the laminate planks, you need to acclimate them to the room temperature and humidity. This means letting the planks sit in the room for at least 48 hours before installation.
This allows the planks to adjust to the environment and prevents any warping or shrinking during installation. Stack the planks flat and leave them in the room. Make sure to keep them away from any direct sunlight or heat sources.
Planning Your Layout
Planning your layout is a crucial step in staggering laminate flooring. It involves measuring the room, calculating the plank widths, choosing a staggered pattern, and determining the starting point.
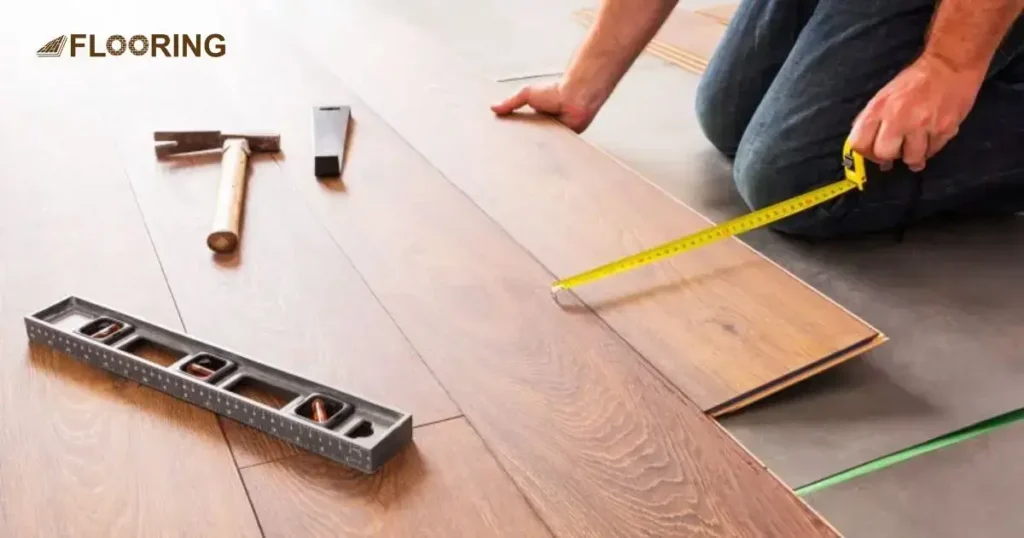
Measuring Room and Calculating the Plank Widths for Staggering
Measure the Room: Measure the length and width of the room to determine the number of planks needed.
Calculate the Plank Widths: Calculate the plank widths based on the room dimensions and the desired laminate floor stagger pattern.
Consider the Stagger Pattern: Consider the stagger pattern you want to use and how it will affect the plank widths.
Calculate the Number of Planks: Calculate the number of planks needed based on the room dimensions and the plank widths.
Check for Obstacles: Check for any obstacles such as heating vents, electrical outlets, or doorways that may affect the installation.
Plan for Expansion: Plan for expansion and contraction of the planks by leaving a small gap between the planks.
Check for Levelness: Check the floor for levelness and make any necessary adjustments.
Plan for Underlayment: Plan for underlayment installation and ensure it is compatible with the laminate flooring.
Choosing a Stagger Pattern
Random Stagger: Choose a random stagger pattern for a unique and visually appealing look.
Uniform Stagger: Choose a uniform stagger pattern for a clean and modern look.
Consider the Room Size: Consider the room size and choose a staggered pattern that complements it.
Consider the Room Style: Consider the room style and choose a staggered pattern that matches it.
Determining the Starting Point
Determine the Starting Point: Determine the starting point for the installation based on the room dimensions and the stagger pattern.
Consider the Room Layout: Consider the room layout and choose a starting point that works best for it.
Consider the Plank Widths: Consider the plank widths and choose a starting point that ensures a smooth and even installation.
Check for Obstacles: Check for any obstacles such as heating vents, electrical outlets, or doorways that may affect the installation.
Plan for Expansion: Plan for expansion and contraction of the planks by leaving a small gap between the planks.
Check for Levelness: Check the floor for levelness and make any necessary adjustments.
Plan for Underlayment: Plan for underlayment installation and ensure it is compatible with the laminate flooring.
Step-by-Step Guide to Staggering
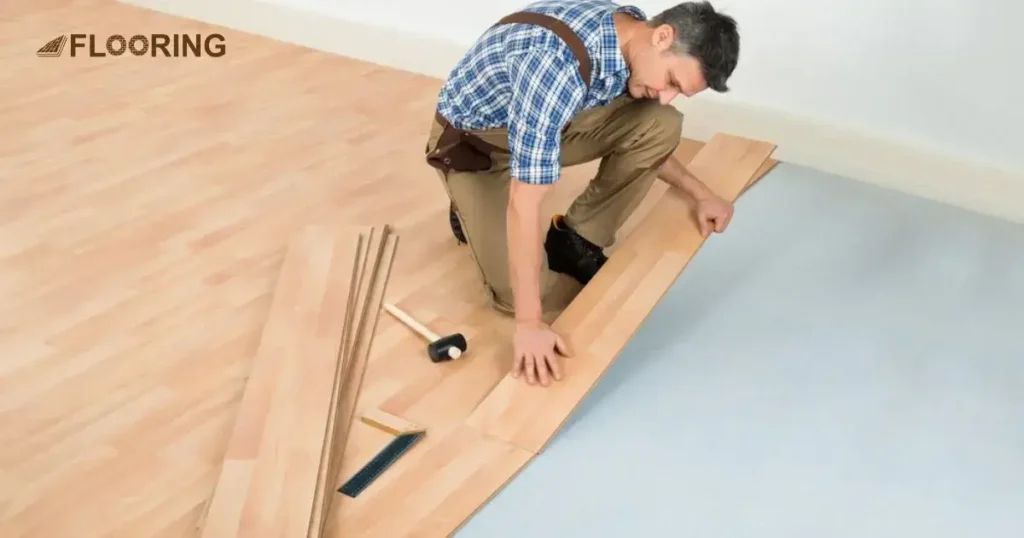
With a step-by-step guide, you can achieve a professional-looking finish while staggering laminate flooring. Here’s a step-by-step guide for the best way to stagger laminate flooring like a pro:
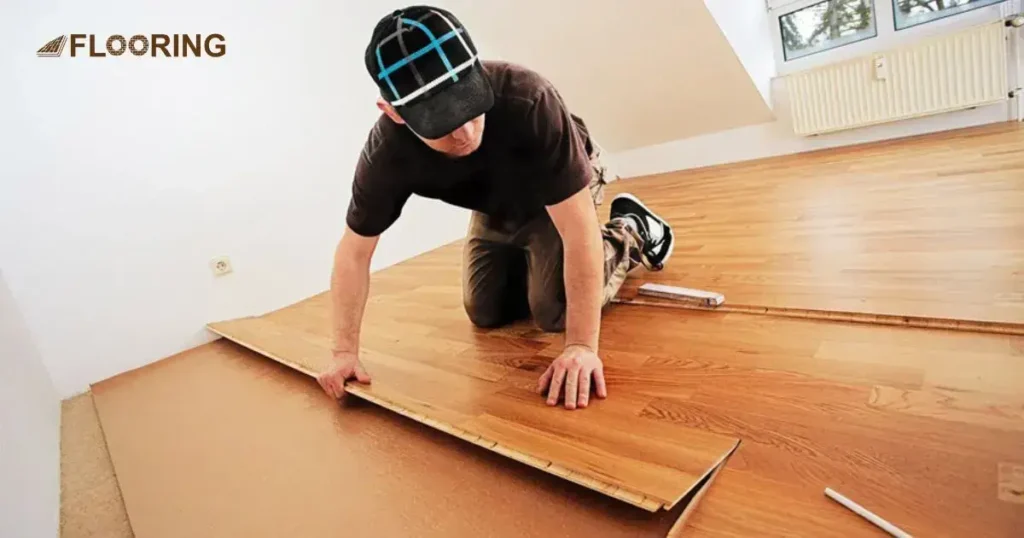
Laying the First Row
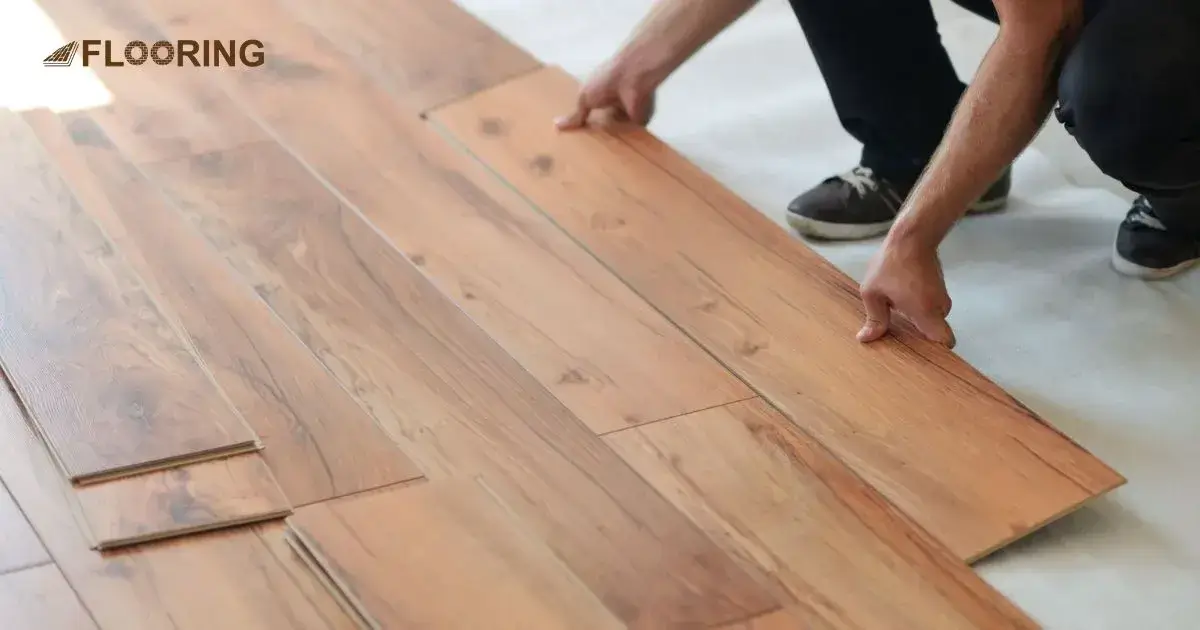
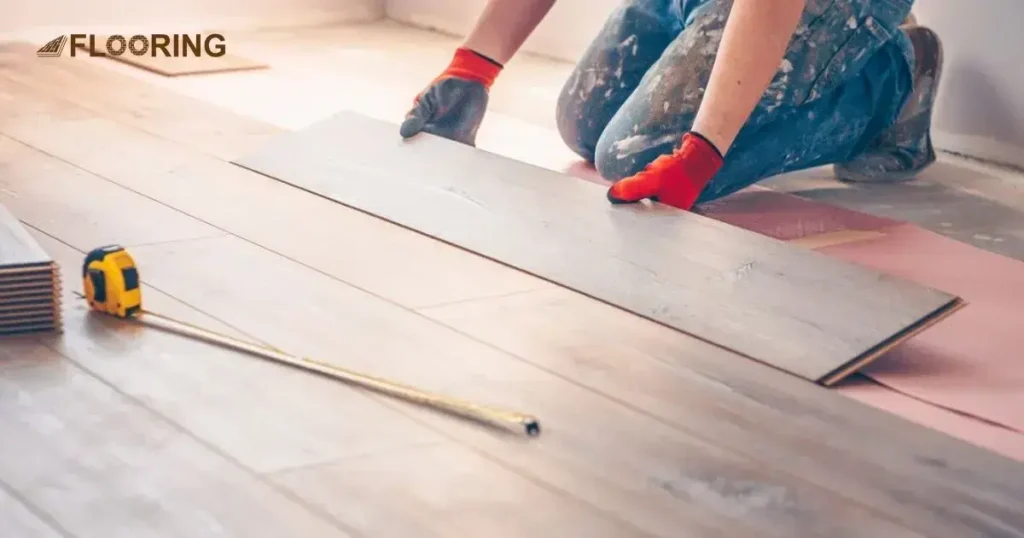
Laying the first row of laminate flooring is important to ensure a smooth and even installation. Start by laying the first plank along the longest wall in the room, ensuring it is level and even. Use a chalk line to mark the location of the next plank, and then lay the plank.
Also, ensure it is aligned with the chalk line. Repeat this process until you have laid the entire first row.
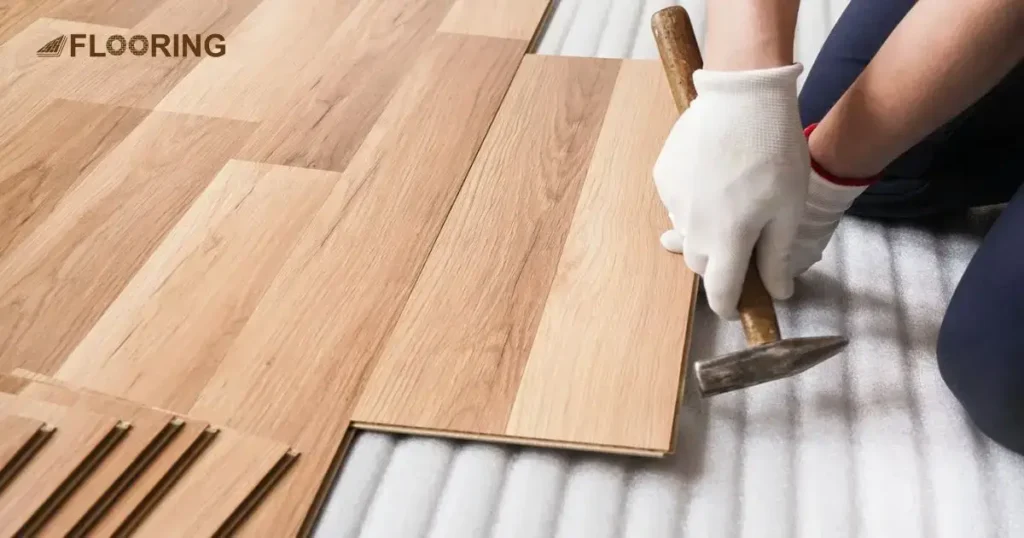
Staggering the Planks and Joints
Staggering the planks and joints is essential for a strong and durable installation. You can start staggering the planks by at least 1/4 inch. Make sure the joints are not aligned. Use a chalk line to mark the location of the next plank, and then lay the plank.
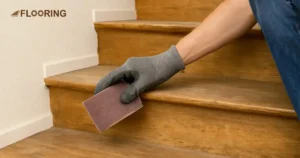
Trimming the Last Row
For a smooth finish, trimming the last row of laminate flooring is vital. Start by measuring the width of the last row, and then cut the planks to fit. You can use a chalk line to mark the spot of the next plank. Repeat this process until you have laid the entire last row.
Installing Transition Strips
If there is a transition between laminate flooring and other flooring types, installing transition strips is crucial. Measure the width of the transition strip, and then cut it to fit. With the help of a marker or chalk, mark the location of the transition strip.
Things To Avoid When Staggering Laminate Floors
When staggering laminate floors, there are mainly two key issues to avoid. It will give you the long-term best results. You must keep these things in mind to avoid when staggering laminate flooring:
H-Joints
Avoid creating H-joints, which occur when the end joints of adjacent planks are aligned in a straight line.
- Stagger the end joints of adjacent rows so that they are at least 12 inches apart.
- Make sure to use a variety of plank lengths to stagger the joints effectively.
- Double-check your layout before starting installation to ensure that the end joints are staggered properly and that no H-joints are present.
- Take your time during installation to carefully stagger the joints and avoid rushing through this crucial step.
Stairstep Pattern

Another common mistake to avoid when staggering laminate floors is creating a stairstep pattern.
- To prevent a stairstep pattern, make sure to stagger the end joints in a random pattern.
- Use a combination of full-length planks and cut pieces to stagger the end joints effectively and break up any potential stairstep patterns.
- Consider dry-fitting the planks before installation to experiment with different layouts and find the most visually pleasing staggering pattern.
- Take into account the overall layout of the room and any architectural features when staggering laminate floors. This can influence the best approach for avoiding stairstep patterns.
Maintaining Stagger Laminate Flooring
Maintaining your stagger laminate flooring is crucial to ensure it looks great and lasts long. Here are some pieces of advice to help you maintain your flooring:
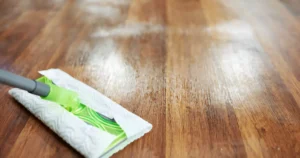
Regular Cleaning
Sweep or Vacuum Regularly: Sweep or vacuum your flooring regularly to remove dirt and debris.
Mop with a Mild Cleaner: Mop your flooring with a mild cleaner to remove dirt and stains.
Avoid Harsh Chemicals: Avoid using harsh chemicals or abrasive cleaners, as they can damage the flooring.
Dry the Floor: Dry the floor thoroughly after cleaning to prevent water damage.
Clean Spills Immediately: Clean spills immediately to prevent them from becoming stains.
Use a Cleaning Solution: Use a cleaning solution specifically designed for laminate flooring to ensure it is cleaned properly.
Preventing Damage
Use Furniture Pads: Use furniture pads to protect the flooring from scratches and damage.
Avoid Sharp Objects: Avoid using sharp objects on the flooring, as they can cause scratches and damage.
Water-Repellent Coating: Use a water-repellent coating on the flooring to prevent water damage.
Humidity-Controlled Environment: Use a humidity-controlled environment to prevent damage from moisture.
Use a Rug: Use a rug to protect the flooring from scratches and damage.
Troubleshooting Common Issues
Identify the Problem: Identify the problem and address it immediately to prevent further damage.
Check for Gaps: Check for gaps between planks and fill them with a sealant to prevent water damage.
Fix Loose Planks: Fix loose planks to prevent them from becoming damaged.
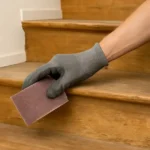
Sand Scratches: Sand scratches to prevent them from becoming deeper.
Check for Warping: Check for warping and sand it down to prevent further damage.
Fix Buckling: Fix buckling to prevent further damage.
By following these steps, you can ensure your stagger laminate flooring remains in great condition and continues to look amazing for years to come.
Comparing Stagger Laminate Flooring to Other Options
Stagger laminate flooring is a popular choice, but how does it compare to other options? In this section, we’ll explore the advantages and differences of stagger laminate flooring compared to traditional laminate and hardwood flooring.
Advantages Over Traditional Laminate
| Feature | Stagger Laminate | Traditional Laminate | Hardwood |
| Appearance | More realistic and varied patterns | Less realistic and uniform patterns | Natural and authentic appearance with unique grains and textures |
| Durability | More resistant to scratches and wear | Less resistant to scratches and wear | Susceptible to dents, scratches, and wear over the passage of time |
| Installation | Easier to install with a staggered pattern | More difficult to install with a uniform pattern | Requires professional installation and may involve subfloor preparation |
| Cost | Generally less expensive | Generally more expensive | More expensive than laminate flooring |
| Maintenance | Easier to clean and maintain | More difficult to clean and maintain | Requires regular cleaning and occasional refinishing |
| Variety | More options for design and color | Fewer options for design and color | Limited options compared to laminate |
| Warranty | Longer warranty period | Shorter warranty period | Shorter warranty period compared to laminate |
| Environmental Impact | More eco-friendly and sustainable | Less eco-friendly and sustainable | Depends on the source and manufacturing process |
Common Mistakes to Avoid While Staggering
There are some general mistakes to avoid while staggering laminate flooring. It can be a bit tricky, but with the right guidance, you can achieve a professional-looking finish. Here are some of the most common mistakes to watch out for:
Ignoring Manufacturer Instructions
One of the biggest mistakes people make when installing laminate flooring is ignoring the manufacturer’s instructions. Each type of laminate flooring may have specific requirements for installation, including staggering the planks.
Manufacturer instructions are provided for a reason, and ignoring them can lead to a subpar finish. Carefully read and follow the manufacturer’s instructions. Avoiding this mistake will ensure a successful installation of laminate floors.
Skipping the Underlayment
The underlayment serves as a moisture barrier. It also helps to reduce noise, provide cushioning, and smooth out minor subfloor imperfections. Skipping the underlayment can lead to a bumpy or uneven finish. Confirm the installation of the underlayment before laying the flooring to ensure a flattened and uniform look.
Misaligning Planks
Misaligning planks is a mistake that can significantly detract from the overall appearance of your laminate flooring. When staggering the planks, it’s important to ensure the joints are properly aligned. It can also cause the flooring to buckle or warp over time. Always align the planks carefully to ensure a smooth and even finish.
What Happens If You Don’t Stagger Laminate Floors?
If you don’t stagger laminate floors, you might have problems:
- Gaps can appear between planks.
- The locking mechanism might not work properly.
- Plank ends should not line up in a straight row.
- Gapping can cause moisture to seep in and damage the floor.
- The locking mechanism can fail, causing planks to pop out or shift.
- This can create an uneven and unstable surface.
- Staggering laminate floors is not just about looks, it helps keep the floor in good shape.
- It avoids annoying and potentially costly problems.
- Proper staggering ensures the floor can expand and contract naturally.
- This prevents gaps from forming and keeps the floor stable.
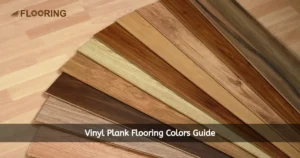
How to stagger vinyl plank flooring?
To stagger vinyl plank flooring, start each row with a plank of a different length, ensuring the end joints are offset by at least 6 to 12 inches from the previous row. This technique not only enhances the visual appeal but also strengthens the floor’s stability.
How To Stagger Laminate Flooring For Beginners?
Staggering laminate flooring for beginners is simple and enhances your floor’s appearance. Start by gathering tools and ensuring the subfloor is clean and level. Let the planks acclimate to the room’s temperature for 48 hours.
Begin installation along the longest wall, using spacers for expansion gaps. To stagger laminate flooring effectively, start each row with a different length plank, keeping end joints 6 to 12 inches apart from the previous row. This method improves both appearance and stability.
Avoid aligning joints directly across rows for a more natural look. By following these steps, beginners can achieve a professional finish.
Closing Thoughts on Staggering Laminate Floors
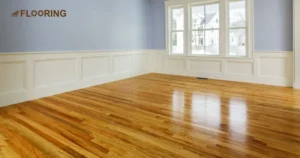
Staggering laminate flooring is an essential technique that enhances the visual appeal of your floor. It also ensures its longevity and durability. By following the proper steps outlined in this guide, you can create a stunning and professional-looking floor.
The benefits of wood are undeniable, and by staggering your laminate flooring, you can enhance these benefits even further. Staggering laminate flooring is not only aesthetically pleasing, but it’s also durable and easy to maintain. With its resistance to scratches and wear, it’s perfect for high-traffic areas and families with young children.
By choosing to stagger laminate flooring, you’re not only getting a beautiful and functional floor, but you’re also making a smart investment for your home. With its persistence and low maintenance requirements, it’s a floor that will last for years to come.
Common Questions Answered About Staggering Laminate Floors
What happens if you don’t stagger laminate flooring?
If you don’t stagger laminate flooring, you risk weakening the floor’s structural integrity, which can lead to gaps and buckling over time. It also creates an unappealing, uniform look that detracts from the overall aesthetic of the room. Staggering helps distribute weight evenly and enhances the floor’s appearance.
How do you lay laminate flooring in a pattern?
Start in the left corner and install boards from left to right. Excitingly, stagger the end joints so they don’t line up. This creates a trendy, flowing look!
What is the minimum stagger for laminate flooring?
The minimum stagger between end joints is 6 inches. Following this rule gives your floor a gorgeous, naturally random pattern.
How not to lay laminate flooring?
Never install laminate over thick carpet or cushioned surfaces. The subfloor must be perfectly flat, clean, and dry. Avoid straight lines or “stair-stepping” the joints – it looks unnatural.
Why is underlayment crucial for the success of laminate flooring?
Underlayment is absolutely essential! It cushions your steps, absorbs moisture, and prevents annoying clicking noises. Without it, your dream floors could squeak, shift positions, and wear down rapidly.