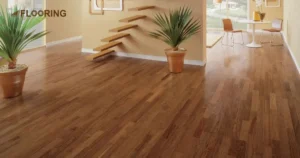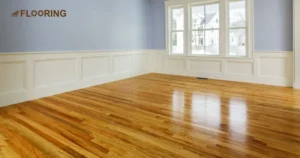
If your are noticing your hardwood floors starting to ripple or curl at the edges? You’re likely dealing with cupping, a common issue caused by moisture imbalance. The good news? You don’t always need to replace your floors.
In this guide, you’ll learn how to fix hardwood floor cupping fast from understanding what causes it, to the most effective DIY repair methods and how to prevent it from happening again.
Whether you’re seeing early signs or dealing with more serious damage, this step-by-step walkthrough will help you restore your floors safely and confidently.
📑 Table of Content
Key Takeaways on How to Fix and Prevent Cupping
- Cupping happens when hardwood floors absorb moisture, making the edges of the planks rise up. It’s frustrating, but you can fix it!
- Spot cupping by looking for uneven floors, gaps between planks, curving boards, and discoloration. A keen eye will help you catch it early.
- Grab a trusty moisture meter to check for sneaky water hiding beneath your beautiful hardwood. Knowledge is power in the fight against cupping!
- Dry out that floor pronto! Bring in the fans, crank up the dehumidifier, and get that excess moisture outta there. Your floors will thank you.
- Shims are your secret weapon for leveling out stubborn cupped spots. Wedge ’em in, secure ’em tight, and watch those floors flatten out.
- Time to break out the sander! Start coarse, end fine, and always go with the grain. Elbow grease now means smoother floors later.
- Lock out moisture for good with the right sealant. A quality barrier keeps cupping at bay and lets your hardwood shine.
- In tough cupping cases, it’s okay to bring in the pros. They’ve got the tools and know-how to get your floors looking fab again.
- Prevent future floor failures by keeping your home at a steady 30-50% humidity. A comfy house means happy hardwood!
What is Hardwood Floor Cupping?
When wood is exposed to moisture, it soaks up water and swells. As the moisture evaporates, the wood shrinks, causing it to contract. This constant cycle of expansion and contraction can lead to cupping, especially in areas with high humidity or extreme temperature fluctuations.
Hardwood floor cupping is a general problem that can affect the appearance and longevity of your beautiful floors. It occurs when the wood planks shrink or expand due to changes in humidity and temperature. This expansion and contraction cause them to curl up or cup inward. It leads to uneven surfaces, unsightly gaps, and even structural damage if left unchecked.
What Does Cupping on a Hardwood Floor Look Like?

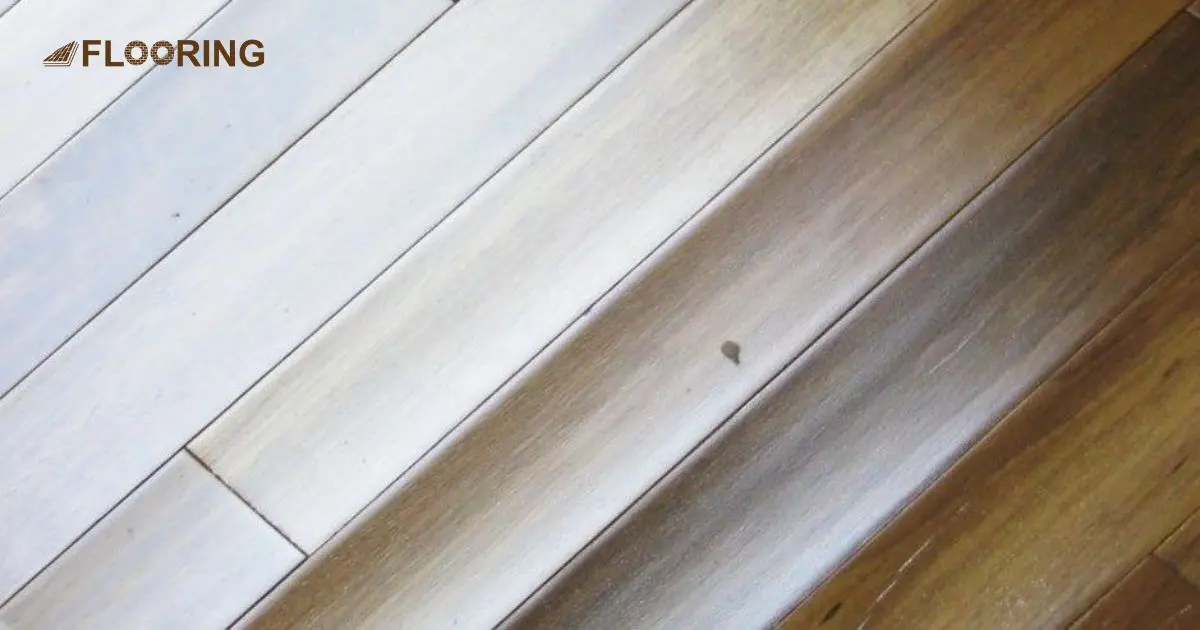
Cupping on a hardwood floor is visually distinct. You may notice the edges of the planks curving upward while the center appears lower. This can create a wavy or rippled effect across the floor. In severe cases, the cupping may be accompanied by discoloration or staining, indicating prolonged moisture damage.
As a homeowner, seeing your beautiful hardwood floor develop cupping or any other problem like wax buildup from the laminate floor can be disheartening. It affects the aesthetics of your home and raises concerns about the floor’s structural integrity. Understanding what cupping looks like is the first step toward addressing the issue effectively.
Common Causes of Hardwood Floor Cupping
Hardwood floor cupping can be caused by various factors, each with its own unique impact on your beautiful hardwood floor. Factors that can contribute to this frustrating problem, include:
Moisture Imbalance
- Excessive mopping without proper drying afterward.
- Spills that are left unattended for extended periods.
- Leaky plumbing or appliances lead to water seepage into the flooring.
- Poor ventilation in the room traps moisture and causes it to accumulate.
- Lack of moisture barriers between the subfloor and hardwood planks.
- Concrete subfloors release moisture due to improper installation or environmental conditions.
- High humidity levels in the surrounding environment, especially in areas like basements or bathrooms.
- Improper acclimatization of hardwood flooring before installation, leading to moisture-related issues.

Humidity Fluctuations
- Seasonal changes in humidity levels, such as during the transition from summer to winter.
- Inconsistent use of heating or air conditioning systems, resulting in rapid fluctuations in indoor humidity.
- Improper sealing of windows and doors, allowing moisture to enter the home.
- Lack of proper insulation in the flooring system, leading to moisture penetration from below.
- Elevated humidity levels are caused by factors like cooking, showering, or drying clothes indoors.
- Poorly maintained HVAC systems, leading to inadequate humidity control.
- The presence of moisture sources in the crawl space or basement affects the humidity levels in the entire home.
- External factors like proximity to bodies of water or high rainfall areas, increase ambient humidity levels.
Water Damage
- Plumbing leaks under or near the hardwood flooring.
- Flooding incidents, whether from natural disasters or appliance malfunctions.
- Excessive moisture from potted plants or pet water bowls.
- Roof leaks allow water to penetrate the ceiling and walls, eventually reaching the flooring.
- Improperly sealed windows or doors, allowing rainwater to seep into the home.
- Condensation forms on the surface of the floors due to temperature differentials.
- Ice damming on the roof, causing water to back up and enter the home.
- Moisture infiltration from outdoor elements like snow, ice, or heavy rain.
Subfloor Moisture
- Inadequate moisture barriers between the subfloor and hardwood flooring.
- Groundwater intrusion into the crawl space or basement.
- Poor drainage around the perimeter of the home leads to water accumulation.
- Condensation forms on the underside of the subfloor due to temperature differences.
- Elevated moisture levels in the concrete subfloor, resulting from improper curing or sealing.
- Leaks in the building envelope, allowing water to seep into the subfloor from the exterior.
- Lack of ventilation in the crawl space or basement, causing moisture to accumulate.
- Subfloor materials that absorb and retain moisture, such as untreated plywood or particleboard.
Leaks or Spills
- Unattended spills that penetrate the wood, causing it to swell.
- Plumbing leaks beneath the flooring, introducing excess moisture.
- Water seepage from nearby appliances, like dishwashers or refrigerators.
- Pet accidents that aren’t promptly cleaned up, lead to moisture absorption.
- Roof leaks that allow water to trickle down into the subfloor.
- Overwatering indoor plants, causes water to seep into the flooring.
- Footwear tracking in rainwater or snow leaves moisture on the floor.
- Condensation buildup on windows during humid weather, dripping onto the floor.
Improper Care and Cleaning
- Excessive use of water during mopping, saturating the wood.
- Using harsh cleaning chemicals that strip away protective coatings.
- Failure to dry mop immediately after spills or cleaning, allowing moisture to linger.
- Neglecting to use rugs or mats in high-traffic areas to absorb moisture.
- Using steam cleaners on hardwood floors can introduce excess moisture.
- Ignoring manufacturer’s recommendations for cleaning products and methods.
- Lack of regular maintenance, allowing dirt and debris to accumulate and trap moisture.
- Not using protective pads under furniture legs, leads to scratches and potential moisture damage.
Improper Installation
- Inadequate acclimation of hardwood planks before installation, leading to moisture-related issues.
- Failure to leave expansion gaps around the perimeter of the room, causing buckling.
- Incorrect subfloor preparation, such as unevenness or moisture imbalance.
- Using the wrong type of adhesive or nails during installation compromises stability.
- Installing hardwood flooring in high-moisture areas without proper moisture barriers.
- Ignoring manufacturer’s guidelines for installation procedures.
- Improper spacing between floorboards, preventing natural expansion and contraction.
- Lack of sufficient ventilation during installation, trapping moisture underneath the flooring.
Identifying Cupped Hardwood Floors

To identify whether hardwood floors are cupping, look for these visual signs. Check the floor carefully, paying attention to any areas where the wood appears to be raised or depressed. If you notice any of these signs, addressing the issue promptly is essential to prevent further damage.
Visual Inspection
Cupping can manifest in different ways, but the most common visual signs include:
Uneven Surfaces: The wood planks may appear to be raised or depressed, creating an uneven surface.
Gaps: Gaps can form between the planks, making it difficult to clean or maintain the floor.
Curvature: The wood planks may curve inward, creating a cup-like shape.
Discoloration: Check for discoloration or staining, which can indicate cupping.
Using a Moisture Meter
You can use a moisture meter to detect any moisture under the hardwood flooring and check for:
Moisture Levels: Use a moisture meter to check for moisture levels in the wood.
Humidity Levels: Check humidity levels in the room to ensure they are within the recommended range.
Temperature Fluctuations: Check for temperature fluctuations, as these can cause cupping.
Wood Expansion: Check for wood expansion or contraction, which can indicate cupping.
Moisture Absorption: Check for moisture absorption in the wood, which can cause cupping.
Can Cupped Hardwood Floors Be Fixed?
Yes, cupped hardwood floors can usually be fixed, depending on the severity of the damage and how early the issue is addressed. In most cases, minor cupping caused by moisture imbalance is reversible without replacing the flooring.
Here’s how different levels of cupping are handled:
- Mild Cupping:
If the boards are only slightly raised at the edges, the best solution is to restore normal humidity levels in the room. This allows the wood to gradually return to its original shape. You can use dehumidifiers, air conditioning, or fans to speed up the drying process. - Moderate Cupping:
When the cupping is more noticeable but the boards are still intact, you may need to wait several weeks for the moisture to equalize. During this period, monitor subfloor moisture with a moisture meter to ensure levels are stabilizing. - Severe Cupping or Permanent Damage:
If the wood remains cupped after drying or starts cracking, warping, or separating, it may require sanding to flatten the surface or in worst cases, replacing individual planks. Before sanding, it’s crucial to ensure all moisture issues are fully resolved to avoid further damage.
💡 Pro Tip: Never sand a cupped floor while it’s still wet or swollen, doing so can cause permanent crowning when it dries.
5 Steps to Fix Hardwood Floor Cupping

Fixing hardwood floor cupping requires a step-by-step approach. Following these five steps, you can restore your beautiful hardwood floor to its original condition.
Step–1: Drying the Hardwood Floor to Fix the Cupping
- Remove Excess Moisture: Remove excess moisture from the floor using a wet/dry vacuum or towels.
- Use Fans: Use fans to circulate air and speed up the drying process.
- Monitor Humidity: Monitor humidity levels to ensure they are within the recommended range.
- Avoid Over-Drying: Avoid over-drying the floor, as this can cause further damage.
- Check for Dryness: Check for dryness by applying a small amount of water to the floor. If it absorbs quickly, the floor is dry.
Step–2: Fix Hardwood Floor Cupping with Shims
- Identify Cupped Areas: Identify areas of the floor that are cupped.
- Insert Shims: Insert shims under the cupped wood floor areas to level the floor.
- Secure Shims: Secure the shims with nails or screws.
- Check for Levelness: Check for levelness by running a straightedge across the floor.
- Adjust Shims: Adjust the shims as needed to ensure the floor is level.
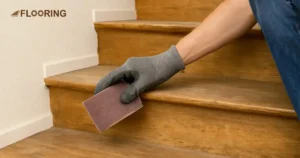
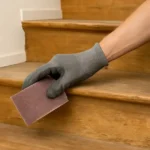
Step–3: Sanding Method to Fix Hardwood Floor Cupping
- Use a Sanding Block: Use a sanding block to sand the floor, working in small sections.
- Start with Coarse Sandpaper: Start with coarse sandpaper and work your way up to finer grits.
- Sand in the Direction of the Wood: Sand in the direction of the wood grain to avoid scratching the floor.
- Check for Smoothness: Check for smoothness by running your hand across the floor.
- Repeat as Necessary: Repeat the sanding process as necessary to achieve a smooth finish.
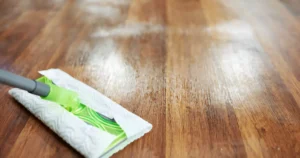
Step-4: Fix Hardwood Floor Cupping with Sealant
- Choose the Right Sealant: Choose a sealant that is suitable for your hardwood floor.
- Apply the Sealant: Apply the sealant to the floor, following the manufacturer’s instructions.
- Allow the Sealant to Dry: Grant the sealant to dry according to the manufacturer’s directions.
- Check for Adhesion: Check for adhesion by applying a small amount of water to the floor. If it sweats, the sealant is effective.
- Repeat as Necessary: Repeat the sealing process as necessary to achieve the desired level of protection.
Step-5: Reinstallation to Fix Hardwood Floor Cupping
- Remove Old Flooring: Remove old flooring, including any damaged or cupped planks.
- Install New Flooring: Install new flooring, ensuring it is properly secured and leveled.
- Check for Levelness: Check for levelness by running a straightedge across the floor.
- Secure the Flooring: Secure the flooring with nails or screws.
- Check for Smoothness: Check for smoothness by running your hand across the floor.
The Importance of Fixing Cupping

When it comes to the importance of fixing hardwood floor cupping, it’s crucial to understand the impact it can have on your home. Whether your new hardwood floor cupping or the old one, fixing cupping is vital to maintain the integrity and appearance of your hardwood floor.
Failure to address cupping on time can result in more serious damage, such as cracks or splits, that can be expensive to fix. By dealing with cupping early on, you can avoid these issues and preserve the appearance of your floor for years to come.
How to Prevent Hardwood Floor Cupping?
Preventing future cupping of hardwood floors requires a combination of proper maintenance and careful planning. By following these steps, you can ensure that your hardwood floor remains beautiful and functional for years to come.
Maintaining Proper Humidity Levels

Use a Humidity Meter: Use a humidity meter to monitor humidity levels in your home.
Maintain a Humidity Range: Maintain a humidity range of 30-50% to prevent cupping.
Avoid Extreme Humidity: Avoid extreme humidity levels, as these can cause cupping.
Use a Dehumidifier: Use a hardwood floor cupping dehumidifier to control humidity levels in areas with high humidity.
Monitor Temperature: Monitor temperature fluctuations to prevent cupping.
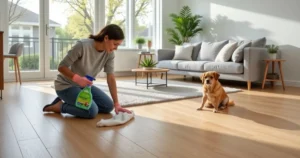
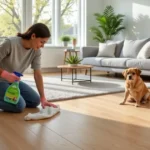
Regular Maintenance
Regular Cleaning: Regularly clean your hardwood floor to prevent dirt and debris accumulation.
Dry the Floor: Dry the floor thoroughly after cleaning to prevent moisture buildup.
Check for Damage: Check for damage or wear and tear on the floor and address it promptly.
Use a Hardwood Floor Cleaner: Use a hardwood floor cleaner to maintain the floor’s finish and prevent cupping.
Avoid Using Too Much Water: Avoid using too much water when cleaning the floor, as this can cause cupping.
Dry the Floor After Cleaning: Dry the floor after cleaning to prevent moisture buildup.
What Not To Do When Cupping is Discovered?

When you discover cupping on your hardwood floor, it’s essential to know what not to do to prevent further damage. Ignoring the issue or taking the wrong approach can lead to costly hardwood floor cupping repair and even more significant problems.
Don’t Ignore the Issue
Ignoring the issue of cupping can lead to further damage and even more significant problems. Cupping can cause the wood to warp, crack, or split, which can be costly to repair. Ignoring the issue can lead to the growth of mold and mildew, which can pose health risks to you and your family.
Don’t Use the Wrong Cleaning Products
Using the wrong cleaning products can exacerbate the issue of cupping. Avoid using harsh chemicals or abrasive cleaners, as they can damage the finish and further cupping. Instead, use a gentle cleaner specifically designed for hardwood floors.
Don’t Over-Sand the Floor
Over-sanding the floor can cause further damage and even more significant problems. Sanding too aggressively can scratch the finish and create uneven surfaces. Additionally, over-sanding can cause the wood to become too thin, leading to further cupping.
First Thing to Do When You Notice Hardwood Floors Cupping

When you notice your hardwood floor is cupping, the first thing to do is to stop and assess the situation. Cupping can be a sign of a more serious issue, such as moisture damage or improper installation. By taking immediate action, you can prevent further damage and ensure the longevity of your hardwood floor.
Identify the Cause
The first step in fixing cupping is to identify the cause. Is it due to moisture damage, improper installation, or wear and tear? Understanding the cause will help you determine the best course of action to fix the issue. Take a closer look at the floor and check for any signs of moisture, such as water stains or warping.
Check for Moisture
Moisture is a common cause of cupping, so it’s essential to check for any signs of moisture damage. Check the floor for water stains, warping, or discoloration. If you observe any of these hints, moisture is likely the reason for the cupping. In this case, you’ll need to address the moisture issue before proceeding with fixing the cupping.
Check the Subfloor
It’s important to examine the foundation of your hardwood floor, which is the subfloor, for any signs of damage or wear. Check for cracks, warping, or unevenness in the subfloor. If you see any of these signs, the subfloor could be causing the cupping. Prioritize fixing the subfloor issue before addressing the cupping.
Common Mistakes to Avoid Hardwood Floor Cupping

When it comes to fixing hardwood floor cupping, it’s essential to avoid common mistakes that can lead to further damage and costly repairs.
- Failing to check for moisture in the subfloor or hardwood floor can lead to cupping and other moisture-related issues.
- Using harsh chemicals or abrasive cleaners can damage the finish and cause further cupping.
- Not allowing the floor to dry completely after cleaning or maintenance can lead to moisture buildup and cupping.
- Overlooking uneven surfaces in the subfloor or hardwood floor can exacerbate cupping and cause further damage.
- Leaving gaps between the planks can cause cupping and make the floor more susceptible to damage.
- Failing to follow proper installation techniques can lead to cupping and other issues from the start.
- Not maintaining the floor regularly through cleaning, drying, and finishing can lead to cupping and other problems over time.
By avoiding these common mistakes and taking proactive steps to maintain your hardwood floor, you can prevent cupping and ensure its beauty and functionality for years to come.
What Happens if Cupping Doesn’t Get Fixed?

Warped or Cracked Wood: Cupping can cause the wood to warp or crack, leading to uneven surfaces and potentially even splits.
Moisture Damage: Cupping can lead to moisture damage, which can cause further damage to the wood and potentially even lead to mold or mildew growth.
Increased Maintenance: Cupping can increase the need for maintenance, as the floor may require more frequent cleaning and drying to prevent further damage.
Reduced Lifespan: Cupping can reduce the lifespan of your hardwood floor, as the damage can spread and become more severe over time.
Increased Risk of Pests: Cupping can increase the risk of pests, such as termites or carpenter ants, as the damaged wood can provide an entry point for these pests.
Decreased Property Value: Cupping can decrease the property value of your home, as a damaged hardwood floor can be a major turn-off for potential buyers.
Increased Risk of Accidents: Cupping can increase the risk of accidents, as the uneven surface can be slippery and potentially even lead to falls.
Final Words on Fixing Hardwood Floor Cupping
Fixing hardwood floor cupping is not just about restoring the appearance of your floors; it’s about preserving the integrity and comfort of your home. By addressing cupping promptly and effectively, you can create a safe and inviting environment for yourself and your loved ones.
Hardwood floors are made to withstand the test of time, but they require care and attention to maintain their beauty and functionality. So, whether you choose to DIY or seek professional help, taking action to fix hardwood floor cupping is an investment in the long-term health and happiness of your home.
FAQs About Hardwood Floor Cupping
Will cupped hardwood floors flatten out over time?
Cupped hardwood floors may partially flatten out over time with proper moisture management and repairs, but full restoration may require professional intervention.
What is the difference between cupping and crowning hardwood floors?
Cupping refers to the edges of hardwood planks curling upward, while crowning involves the center of the plank being higher than the edges, often caused by excessive moisture or pressure.
How long does it take for cupping to go away?
The time it takes for cupping to go away depends on factors such as the severity of the cupping, the underlying cause, and the effectiveness of the chosen repair methods.
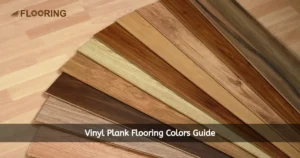
Are there specific types of hardwood more prone to cupping?
Yes, there are specific types of hardwood that are more prone to cupping. Some of the most common ones are mentioned below:
- White Oak
- Red Oak
- Maple
- Cherry
- Walnut
- Hickory